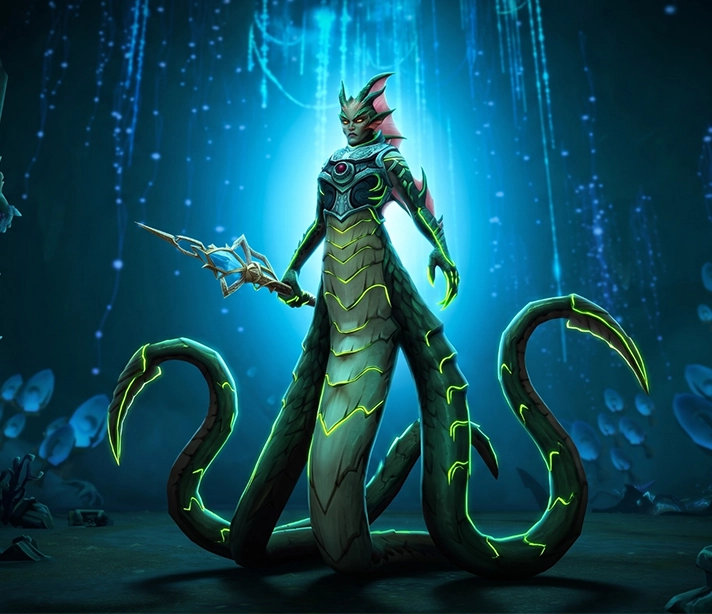


The Venomous Abyss is the flagship raid of WoW Midnight Season 2 — eight bosses beneath the Coiled Isle, ending at Ula’tek, the five-headed snake goddess the Amani spent sixteen thousand years keeping buried. Patch 12.1 opened the vault, and this Venomous Abyss raid guide covers all of it: full tactics for every boss on Normal, Heroic and Mythic, the complete loot and item level table, Season 2 tier sets for all thirteen classes, and how to prepare for each difficulty from Story Mode to Mythic — and if raid nights aren’t your thing, our WoW raid boost team clears it for you.
 ⤢ Click to enlarge
The Venomous Abyss: Quick Facts
The raid is live on the current Season 2 schedule, with every difficulty open on the standard release cadence. The connected Mythic+ dungeon, Altar of Fangs, runs in the Season 2 rotation alongside it.
Boss Cheat Sheet: One Thing to Do, One Thing to Dodge
The thirty-second version for raid night. Full breakdowns for every boss follow below.
| Boss | Must do | Must avoid |
|---|---|---|
| Nek’zali the Soulcoiler | Kill Restless Amani before they reach the Soulcoil Well | Essence Rend puddles — drop them at the edges |
| Entombed Sentinels | Pair up to exactly 4 Helical Toxins orbs (3+1 or 2+2) | Letting the golems inside 40 yards of each other |
| Vashnik the Malignant | Drag him to a fresh third of the room before every Imbibe | Any add reaching the central Malignant Cavity |
| The Lost Explorers | Feed the Disgusting Fish before Mor’zahi hits 100 energy | Crates left unopened — they detonate raid-wide |
| Sszorak | Note the 1-2-3 tornado order on pull — it sets the wind sequence | Missing the Cyst hit as each wind phase starts |
| The Twin Fangs | Clear Eternal Venom in Ravenous Feast pulses | Reaching 11 stacks — instant death |
| The Coiled Altar | Kill both bosses simultaneously in Phase 3 | Guillotine soaks without splitting the raid |
| Ula’tek | Crack eggs in Spectral Coils soaks, never in venom | Leaving the Gore Rattler untanked — Rattler Slam wipes |
Where Is the Venomous Abyss and How Do You Enter?
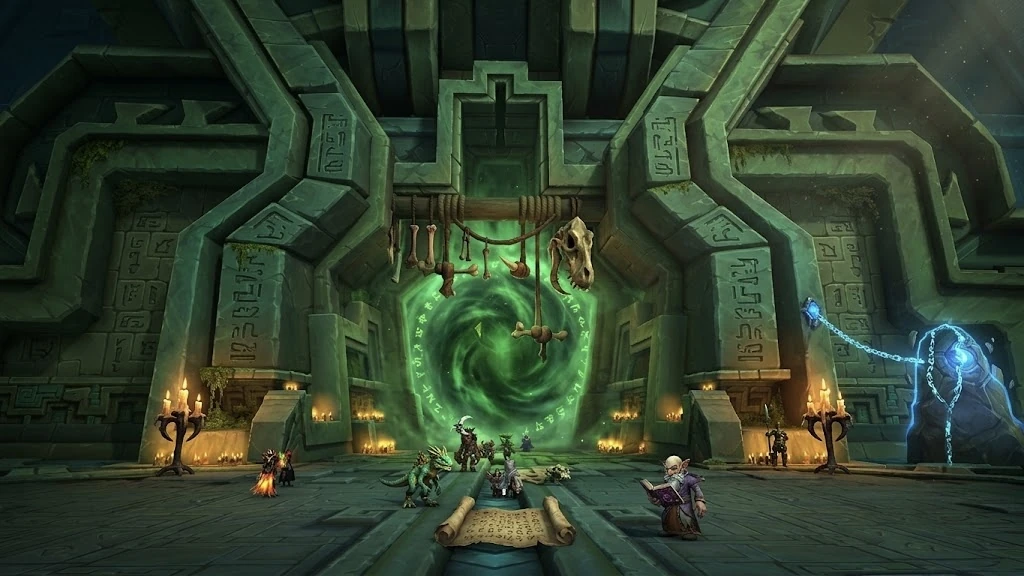
The raid sits inside the Vaults of Atal’Utek on the Coiled Isle — Midnight’s Season 2 outdoor zone, with the raid entrance on the isle’s north side. Three gate entry points lead into the vault, so split raids regroup quickly. The Coiled Isle itself carries the season’s outdoor loop: zone events, rare elites, Cursed Fishing and the Altar of Corrosion island talent tree — worth touching before raid night for the minor power gains alone.
 ⤢ Click to enlarge
What Is the Venomous Abyss Boss Order?
Nek’zali the Soulcoiler opens the raid and Ula’tek closes it, with the six bosses between them split across two wings. The Venomous Abyss runs a hub layout: boss 1 opens the vault, then two wings of two bosses each (bosses 2-5 in either order), then the raid returns to the central pit for bosses 6, 7 and 8 in sequence.
What Changes Between Normal, Heroic and Mythic?
Heroic adds extra soak groups, penalty debuffs and add revives on top of the core fight; Mythic layers new adds, permanent mechanics and harsher timers over both. The bosses are the same eight fights on every difficulty — what changes is how many extra mechanics stack on top. Here’s the short version before you pick a tier:
| Difficulty | Group size | What’s added | Who it’s for |
|---|---|---|---|
| LFR | 10-30, queued | Core mechanics only, heavily softened | Seeing the raid and the story |
| Normal | 10-30, flexible | Core mechanics as written below | Alts, catch-up, first clears |
| Heroic | 10-30, flexible | Core + every Heroic addition — extra soak groups, penalty debuffs, add revives | Ahead of the Curve and weekly gearing |
| Mythic | 20, fixed | Core + Heroic + Mythic additions — new adds, permanent mechanics, punishing timers | Cutting Edge, top item level, the mount |
All 8 Bosses: Full Tactics and Strategy
Below is every encounter, phase by phase, with Heroic and Mythic additions marked separately so you can read only the tactics that apply to your tier. Each boss opens with the core fight, then stacks the difficulty-specific mechanics on top. Any single boss, wing or full clear can also be handled through our Venomous Raid Boost Services once the gates open.
1. Nek’zali the Soulcoiler
The opener, and a pure add-control check. A ghost-ritualist coils the spirits of slain Amani to power the Ritual of Awakening — let the adds reach the well and the raid pays for it immediately.
All difficultiesPhase 1 — The Soul Well
- Add control. Restless Amani spawn from lit coffins. Break their shields with damage to stop their march, then group and cleave them with slows, grips and crowd control before they reach the central Soulcoil Well. Adds that arrive give the boss energy and hit the raid hard.
- Possession Barrage. The targeted tank runs as far from the boss as possible — raid damage from the channelled spirits scales down with distance travelled.
- Hollowing Strikes. A healing-reduction debuff on the tank. Swap once the stacks climb.
- Soulcoil Rite and Essence Rend. Rotate healing cooldowns for the Rite and sidestep its expanding knockback rings. Essence Rend targets run to the room edge before being dispelled, dropping puddles away from the group.
All difficultiesIntermission — Echoes of Jawae (50%)
- The boss goes immune. Kill the Echoes of Jawae to end the phase.
- Group soak. The whole raid stacks inside the Hungering Pyre zones the Echoes cast — the damage is lethal undivided.
- Adds keep coming. Slowing and killing Restless Amani continues through the transition.
All difficultiesPhase 2 — Ramping Shadows
- Ritual Burn. A burn phase with steadily climbing raid damage.
- Zipping puddles. Every Phase 1 mechanic persists, and the Essence Rend puddles dropped earlier now dart randomly across the floor.
HeroicAdditional mechanics
- Rite penalty. Every add that reaches the middle gives the Rite a stacking one-minute debuff. Sloppy add control wipes the raid through the Rite, not the boss.
- Corpse piles. Dead adds leave piles. During the intermission, players with the small personal ring stay out of the group soak and burn the piles — anything left revives as a Vessel of Awakening.
MythicAdditional mechanics
- Grasping Depths. A Drowned Echo wakes inside the Soulcoil Well, periodically pulling players in and pulsing Shadow damage raid-wide until it dies.
- Immortal Coil and Soul Exhaustion. Fighting the echo means standing in the well and taking steady damage. Step out and Soul Exhaustion raises damage taken from the well by 300%.
- Invoke penalty. In Phase 2 the cast interrupts every player casting and silences those interrupted for 3 seconds.
2. Entombed Sentinels
A two-golem council built entirely around separation and a shared health pool. The raid splits in half at the pull and stays split until the intermission forces everyone back together.
All difficultiesPhase 1 — The Divided Golems
- Split and separate. Two equal teams. Tank Breath of Ula’tek (green) and Blood of Ula’tek (red) at least 40 yards apart, or Mark of Acid and Mark of Blood start stacking from proximity.
- Tank pressure. Empowering Slam and Bloodvenom Injection escalate with every consecutive hit on the same target — hold with defensives or swap.
- Green golem. Toxic Droplets sprays slimes in a frontal cone; assigned players run over and squish every one. Venom Coagulation spawns a large slime channelling Contaminate — swap and kill it immediately.
- Red golem. Move the Unstable Miasma indicator to the assigned edge and stack the red team tightly inside. Blighted Blood needs a fast dispel.
All difficultiesIntermission — Toxin Rebalance (100 energy)
- Vitriolic Stasis. Both sentinels meet in the centre and equalise their health pools, healing whichever is lower. Hold cooldowns — damage here is wasted.
- Helical Toxins. Everyone gets a mix of red and green orbs. Spread, check your counts, then run into a player whose orbs total exactly 4 combined with yours — 3+1 pairs with 1+3, and 2+2 pairs with 2+2. A correct match neutralises harmlessly.
All difficultiesPhase 2 — The Swap
- Trade bosses. Once Helical Toxins resolve, tanks taunt-swap and pull the golems back to opposite sides. That resets physical stacks and proximity debuffs, and Phase 1 repeats until 100 energy again.
HeroicMythicAdditional mechanics
- Droplet daggers. Squishing a Toxic Droplet fires shadow daggers back toward the green golem — step on the droplet, then immediately sidestep out of the line.
- Miasma blood drops. Everyone in the Unstable Miasma soak drops a lingering blood pool six seconds later. The red team moves together straight after the soak to lay them cleanly along the wall.
3. Vashnik the Malignant
The raid’s alchemist, and the most positional fight in the instance. Three altars divide the arena into thirds, and where you drag Vashnik decides which adds and which debuffs the raid gets next.
All difficultiesPhase 1 — The Malignant Cycle
- Imbibe and kiting. The arena splits into thirds around three altars — orange (fire), purple (shadow), red (blood). Tanks drag Vashnik to a different third before every Imbibe. He drinks from the two nearest fountains, gains Toxic Vapor and summons living venoms that crawl toward the central Malignant Cavity.
- Nothing reaches the cavity. Any add that arrives triggers severe raid damage and a stacking DoT.
- Orange altar. Two slimes, crowd-controllable for up to 60 seconds. They explode on death and stack a raid DoT — stagger the kills.
- Purple altar. Five slimes. Group and AoE them fast, then dodge the void swirls they leave behind.
- Red altar. One large slime, immune to crowd control. It splits into smaller ones on death — cleave them down immediately.
- Tanks and spread. Swap after every Dripping Fangs for the physical amp and stacking DoT. Plague Froth targets spread out and stand completely still so everyone else can dodge the waves.
All difficultiesFountain debuffs
- Orange — Exploding Infection. A fire DoT that erupts in AoE when removed. Stagger dispels so healers can absorb the spikes.
- Purple — Stygian Infection. Periodically bursts void zones underfoot. Spread and keep moving.
- Red — Siphon Blood. A healing absorb. Affected players stand near healthy raiders to siphon health and clear it.
HeroicAdditional mechanics
- Malignant Catalyst. Green soak rings drop around the room; assigned players step into each one or the raid eats an explosion.
- Blood add death DoT. Red altar slimes apply a stacking DoT when they die, which makes controlled, staggered cleave mandatory rather than optional.
MythicAdditional mechanics
- Malignant Totems. Every Imbibe conjures totems from the active fountains — extra high-priority targets on top of the adds.
- Stacking Exploding Infection. The fire debuff gains a stack every 1.5 seconds until dispelled, so a late dispel means a far bigger eruption.
- Tumor destruction. Plague Waves from Plague Froth have to be angled to hit and destroy the Malignant Tumors spawning around the arena.
4. The Lost Explorers
A three-target council with a hidden timer. Kill pacing matters, but the fight is really decided by crate management and by feeding a very disgusting fish to the right boss at the right moment.
All difficultiesPhase 1 — The Tortollan Trio
- Positioning and enrage. Tanks hold Nama and Iku while Trader Gebbo wanders counter-clockwise. Swap on Iku and Nama as defensives run dry, and bring all three down at roughly the same time or the fight enrages.
- Iku. Interrupt Icebound Flames and dispel the DoT if a cast lands. When Blink Nova targets you, run away from the group in the direction you want Iku to teleport — the AoE scales with distance.
- Nama. Step aside from the three shells fired in a frontal cone during Shell Spin.
- Gebbo — Throw Junk. Step on dropped crates to open them before they detonate raid-wide. Opening applies a stacking bleed, so rotate the players doing it.
All difficultiesPhase 2 — The Disgusting Fish
- The wipe timer. Opening crates reveals a Disgusting Fish. Someone picks it up and uses the Extra Action Button next to a boss to feed them, resetting Mor’zahi’s energy before it hits 100 and wipes the raid. Each boss can be fed once, and each one unlocks a different mechanic:
- Fed Gebbo. He drops a central bomb and bouncy mushrooms. The whole raid stacks on a mushroom and jumps together to clear the expanding blast ring — do not trigger the mushrooms early.
- Fed Iku. Fire and frost circles target players. After impact, victims drop elemental puddles — walk into the opposite element to neutralise the DoT and clear the floor.
- Fed Nama. Three rapid leaps with group-soak rings. Stack inside each ring to split the damage.
HeroicMythicAdditional mechanics
- Proximity shield. The tortollans take 99% reduced damage within 30 yards of each other. Tanks actively kite to keep them apart despite Iku’s teleports and Gebbo’s wandering.
- Lingering fire. Gebbo’s bomb leaves a large, long-lasting fire patch that badly restricts the space you have left for dodging shells.
5. Sszorak
The wind fight. Everything in Phase 2 depends on something you have to notice in the first ten seconds of the pull, which makes Sszorak the encounter most often lost before it properly starts.
All difficultiesPhase 1 — Apex and Crosswinds
- Read the tornadoes on pull. Check the three arena sections and note where 1, 2 and 3 tornadoes appear. That order is the exact direction sequence of the Phase 2 pushback winds.
- Apex Predator (tank combo). Ravage and Mutilate together, stacking Corroding Venom physical amps. Face Ravage away from the raid and Mutilate toward the group, and taunt-swap so each tank takes exactly one of each.
- Venomous Surge. Distance-scaling raid damage — run far from the group. Drop the resulting Cyst directly opposite where the Phase 2 winds will originate.
- Raging Crosswind. Dodge the Tempest tornadoes. When targeted, align your beam directly at another targeted player pointing back at you — matched beams cancel the knockback.
All difficultiesPhase 2 — Howling Maelstrom
- Dig In. Sszorak burrows and takes 30% increased damage for the phase. Everything goes here.
- Howling Maelstrom. Winds push the raid across the arena in the order you noted at the pull: 1-tornado section, then 2, then 3. An assigned player hits a placed Cyst exactly as each wind phase begins to knock the raid back against the wind — miss it and people go off the edge.
HeroicMythicAdditional mechanics
- Mutilate split soaks. Mutilate now needs two dedicated soak groups alternating in front of the boss, one group per cast.
6. The Twin Fangs — Vexhul & Ithraz
A two-boss fight where the real enemy is a stack counter. Eternal Venom accumulates on everyone, and the entire encounter is a negotiation between taking stacks and clearing them.
All difficultiesPhase 1 — Vexhul and Ithraz
- Eternal Venom. The core mechanic. 11 stacks kills you outright, so manage them constantly — and bring both bosses down evenly.
- Caustic Globule and tank swap. Vexhul knocks the tank back with Caustic Deluge, spawning poison globules. The raid steps in to share the soaks — each globule is one Eternal Venom stack, and the tank cannot absorb them all.
- Stone Breaker (tank). Ithraz places three consecutive rings on the tank, who must step into them in the exact order they appeared. Wrong order means heavy raid damage. Swap afterwards.
- Venomous Emergence. Centre adds surface fast — turn and kill them before their channels add more venom stacks. Beam targets stand still so the rest can dodge the line.
- Movement and stack clearing. Dodge Stir the Depths waves, run Coiling Ichor puddles to the edges, and clear venom by standing in Ravenous Feast — it pulses three times, removing one stack per pulse from everyone inside.
All difficultiesIntermission — Death Beam
- Submerge. Both bosses dive. Read the floating ring of orbs in the centre to work out which way the giant laser rotates, then run along that rotation while sidestepping ground hazards.
All difficultiesPhase 2 — Return of the Fangs
- Same fight, tighter margins. The bosses resurface and Phase 1 mechanics resume. Keep the stacks managed and the health pools level until both die.
HeroicAdditional mechanics
- Venom cap drops to 10. Less room for error on every soak.
- Ravenous Feast splitting. A debuff now prevents soaking multiple pulses — assign three separate groups, each taking exactly one pulse.
- Intermission goop. Touching any ground goop during the laser phase applies a severe slow, which is usually fatal during a rotating beam.
MythicAdditional mechanics
- Globules on death. A player who dies holding any Eternal Venom stacks erupts extra Caustic Globules from their corpse, forcing immediate backup soaks from whoever is nearest.
7. The Coiled Altar
Two bosses, three phases and a finale where both are active at once on a shared health pool. The hardest coordination fight before Ula’tek herself.
All difficultiesPhase 1 — Zul’jan
- Axe Grinder and Venom Fang. Dodge the spinning axe projectiles, cleanse or heal through the poison debuffs on random players.
- Coalesced Venom and Sever. Players run over spawned venom orbs to collect them, then drop them in a tight pile at the assigned spot five seconds later. The active tank aims the Sever frontal cone at the pile to destroy them, then swaps.
- Guillotine and Fangs of the Coiled Altar. The Guillotine target runs to the edge, the group stacks to split the soak, then sprints out before the floor erupts. During Fangs, run to the centre — the edges flood.
All difficultiesPhase 2 — Malacrass
- Dreadmarch and Manifestations of Dread. Mind-controlled players walk under the boss while DPS break their absorb shields. Freed targets get fixated by ghosts — facing a ghost freezes it, looking away lets it move. Kite them to the stack point for the tank to destroy with Soul Sever.
- Gravebound and Gloombomb. Spread when Gloombomb targets you. Tanks and Gloombomb targets must collect their dropped soul fragments before they expire — missing one is instant death.
- Eternal Nightfall. At 100 energy Malacrass channels a raid-wide cast. Burn through his absorb shield fast to interrupt it.
All difficultiesIntermission — The Convergence
- Ghastly Regeneration. Zul’jan takes 100% increased damage in this window — Bloodlust and every offensive cooldown belongs here.
- Fragments of Malacrass. Fragments walk toward Zul’jan to heal him. Players step on the ghosts to destroy them, staggering the interceptions so healers can handle the resulting AoE bursts.
All difficultiesPhase 3 — Twin Horrors
- Soulbound. Both bosses are active, sharing one health pool, and must die at the same time — otherwise the survivor enrages for 500% increased damage.
- Combined clearing. Group the Coalesced Venom orbs and the Manifestation ghosts in the same spot so one tank cone clears both mechanics at once.
HeroicAdditional mechanics
- Orb DoT stack. Destroying venom orbs applies a stacking raid-wide DoT — clear them in small batches, never all at once.
- Guillotine soak groups. Guillotine now applies a vulnerability debuff, so the raid splits into two groups alternating the soaks.
- Ghost contact. Touching a Manifestation ghost in Phase 2 is instant mind control.
- Spiritcackle. Phase 2 adds cast raid-wide fears. Focus them and interrupt on sight.
MythicAdditional mechanics
- Mutating venom. Coalesced Venom orbs mutate into Virulent Cysts and Virulent Mutations, and Toxic Deluge detonates anything still left in a deadly eruption.
- Volatile Venom. Now applies Tainted Blood on top.
- Endless Guillotine. The Guillotine mechanic never stops — it runs for the entire fight rather than on a schedule.
8. Ula’tek, the Five-Headed Goddess
Three phases, an intermission that destroys the arena, and eggs. So many eggs. The final encounter asks every role to do a job the raid has not done all instance, and the egg carriers decide most pulls.
All difficultiesPhase 1 — Eggs and the Rattler
- Egg management. Assigned players pick up Blightscale Spawn eggs and keep them clear of every venomous ground effect. An egg touched by venom hatches into a lethal Blightscale Viper and applies raid-wide Putrid Membrane. Eggs instead go to Spectral Coils soaks to crack safely into weak Rawlings.
- Mother’s Wrath (tank combo). Knocks the active tank back and spawns a red soak circle. The tank stands inside to absorb the follow-up strikes, taking Stone Venom and Hobbled. Miss it and the full assault hits the raid — that is a wipe. Swap after the following Gore Rattler.
- Gore Rattler. Spawns at the edge and must be tanked instantly, or it channels Rattler Slam and wipes the raid. It projects two Spectral Coils soak zones — egg carriers step in with the raid to split damage and hatch eggs into Rawlings. Run out of its expanding green ring afterwards.
- Rage of the Shackled and Heart Burn. Dodge the falling debris. Ula’tek’s Venomous Heart becomes exposed and takes 100% increased damage — all single-target damage goes there, and it is shared with her main body.
- Caustic Waves. She winds up one side and sweeps poison across that half of the room. Move egg carriers to the safe side; if the Rattler tank is trapped, they eat the waves instead. One tank stays in melee range at all times to prevent Unchecked Rage.
All difficultiesPhase 2 — Doomscale Split
- Split and swim. Ula’tek dives into the acid, opening left and right channels. Split evenly with balanced roles — odds left, evens right — and swim across.
- Doomscale Cauldron. Pick up the Doomscale Warden add and drag it north, avoiding debris and green pools. Interrupt it or it empowers nearby eggs with Writhing Gestation.
- Egg harvesting. Collect small eggs along the path, harvest the large Doomscale Egg at the end, and throw everything into the Cauldron.
- Weakened Doomscale. Dumping the eggs spawns an add — the tank picks it up and faces its wide frontal cone away from the group. Kill everything, then swim back to the centre and repeat Phase 1 until the intermission.
All difficultiesIntermission — Shattered Awakening
- Collect and chain-soak. Group in the centre as egg spawn points appear around the room, grab every egg, find the first ghostly tentacle slam and ping it.
- Move as one stack. The whole raid travels from one Spectral Coils slam zone to the next, splitting soak damage and cracking every collected egg at once. Stun and burn the Rawlings while continuously moving to the next point.
- The floor goes. Ula’tek erupts from the centre and destroys the middle of the arena. The raid gets Slow Fall — land on one of the four new outer platforms.
All difficultiesPhase 3 — Fractured Platforms
- Jump and pick up threat. Move to whichever platform Ula’tek emerges on. Tanks establish threat instantly while melee jump across.
- Kill the clutches. Ranged swap directly onto new Blightscale Clutch eggs as they spawn and destroy them before they gestate, then burn the small adds while keeping the interrupt rotation running.
- Red circles. Targeted players move away from the group — a pulsing green orb appears above them, damaging nearby allies and empowering any remaining eggs on the field.
- Platform destruction. Dodge Caustic Waves shooting through the gaps. Periodically a central tentacle channels Circling Prey and slams down, destroying the current platform. Ping the next safe one and jump before it lands. Repeat until she dies.
HeroicAdditional mechanics
- Soul Constrictor. Players mitigating Spectral Coils soaks are marked and need targeted healing.
- Add debuffs. Rawlings cast Poisonous Bite as a stacking DoT, and Vipers cast Petrifying Sting to stun.
- Mass Gestation. Doomscale Eggs accelerate the hatch timers of every remaining small add on their side unless destroyed quickly.
- Blight Vein. A persistent raid-wide DoT running through all of Phase 2.
MythicAdditional mechanics
- Hardened eggs. Eggs gain Noxious Shell and inflict a severe DoT on whoever carries them.
- Boiling Venom. Rawlings and Shriekers gain the Acidic Expulsion frontal cone.
- Caustic Eruption. When the aura expires, Caustic Waves erupt directly from affected players, creating unpredictable secondary wave lines across the platforms.
What Item Level Does the Venomous Abyss Drop?
Season 2 loot climbs by boss group, with the final two Mythic bosses dropping gear a full tier above everything else in the raid.
| Difficulty | Boss 1 | Bosses 2-3 | Bosses 4-6 | Bosses 7-8 | Crest |
|---|---|---|---|---|---|
| LFR | 279 | 282 | 285 | 289 | Veteran Mistcrest |
| Normal | 292 | 295 | 298 | 302 | Champion Mistcrest |
| Heroic | 305 | 308 | 311 | 315 | Hero Mistcrest |
| Mythic | 318 | 321 | 324 | 344 | Myth Mistcrest |
The 344 pieces from the Coiled Altar and Ula’tek on Mythic sit at the top rung of the Myth track and cannot be reached through upgrades — final-boss reserved, the season’s true chase items. Upgrades run on Mistcrests across Veteran, Champion, Hero and Myth tiers, with Ascendant Venomstones replacing Voidcores for pushing maxed Hero and Myth gear.
Notable Ula’tek drops to watch for: Jaw of the Shackled Goddess, Voracious Heart of Ula’tek, Caustic Repose Greatbow and Jan’thrazet, the Soul Fang.
Which Tier Set Token Drops From Each Boss?
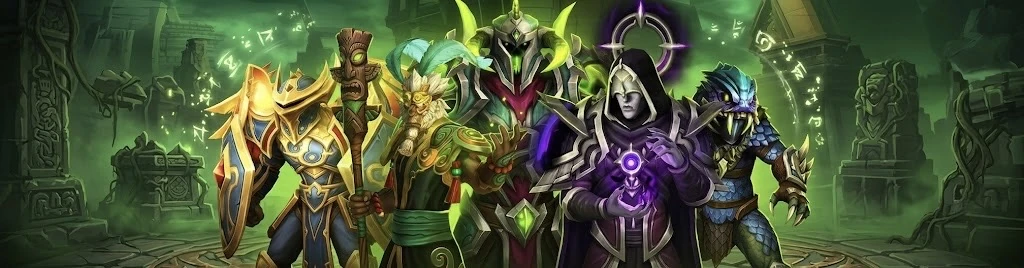
All thirteen classes get a Venomous Abyss tier set:
 ⤢ Click to enlarge
| Class | Tier Set | Class | Tier Set |
|---|---|---|---|
| Death Knight | Baleful Grave-Knight’s Crucible | Monk | Guile of the Monkey King |
| Demon Hunter | Abyssal Doomhound’s Pursuit | Paladin | Radiance of the Consecrated Flame |
| Druid | Bark of the Enigmatic Dreamwatcher | Priest | Cosmic Penitent’s Raiment |
| Evoker | Echo of Calamity | Rogue | Chosen Bloodslayer’s Hexweave |
| Hunter | Skulking Viper’s Ambush | Shaman | Ophidian Oracle’s Prophecy |
| Mage | Primal Leywarden’s Attire | Warlock | Damned Necrolyte’s Shattered Restraints |
| Warrior | Jade Warlord’s Dominion |
Token drops follow the mid-raid gauntlet: Entombed Sentinels — Gloves, Vashnik — Chest, Lost Explorers — Shoulders, Sszorak — Legs, Twin Fangs — Helm, with Ula’tek carrying a class token. The Midnight Catalyst converts off-pieces into whatever slot your luck refuses to drop.
Which Difficulty Should You Raid?
Story Mode and LFR exist for the narrative and the entry loot band — queue in, see Ula’tek fall, collect 279-289 pieces. Normal is the organized-group entry: 292-302 loot, mechanics that teach rather than punish, and the natural first week of raiding for most guilds and pugs.
Heroic is the season’s centerpiece — 305-315 gear, real mechanical checks from the Sentinels’ toxin math onward, and the Ahead of the Curve: Ula’tek achievement that expires when the season ends. This is where most raiders will live, and where wipe nights start costing evenings.
Mythic is the endgame: 318-344 loot, the Cutting Edge: Ula’tek achievement for killing her before the season closes, and the Primeval Skyfriend for those who finish the job. Twenty-player fixed rosters, unforgiving mechanics, and the two final bosses gating the best gear in the game.
Season 2 has a second raid worth knowing about too. The Tidebound Grotto lair is a single-boss encounter on the same Coiled Isle — one fight, thirty minutes, raid-band loot and its own Great Vault credit. It shares the Raid row with this instance, so a weekly lair kill stacks neatly on top of whatever you clear here.
Raid Preparation Checklist
- Item level: aim for the previous tier’s Heroic band before Normal, and 300+ before stepping into Heroic week one — the Sentinels’ toxin math forgives nothing undergeared.
- Consumables: full flask, food and phial coverage plus healthstones; venom-themed tier means poison and nature damage — check your curse and poison dispel coverage while building the roster.
- Interrupt and dispel plan: Malice on the Doomscale Wardens, Vashnik’s ritual windows and the council free-casts all die to an assigned kick rotation, not to improvisation.
- Addons: updated Deadly Boss Mods or BigWigs, WeakAuras for Helical Toxins stack tracking, and a note tool for egg and add assignments on Ula’tek.
- Coiled Isle prep: clear the Altar of Corrosion talents and touch the zone events — free power before the first pull.
How Do You Get the Venomous Abyss Mount and Glory?
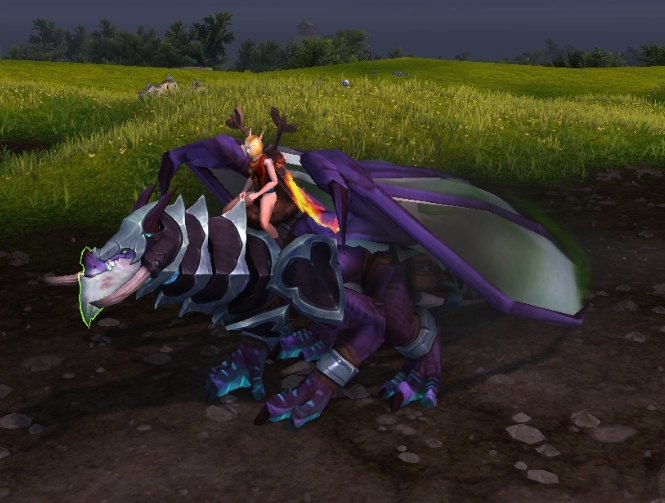
The meta-achievement Glory of the Venomous Abyss Raider rewards the Crimson Venomfang mount and runs through the tier’s confirmed achievement list: Well, Well, Little Sky on Nek’zali, Kept You Waiting Huh? on Vashnik, Is Venom Stasis A Joke To You? on the Sentinels, Accidental Inclusion on the Lost Explorers and No Egg Scramble on Ula’tek, alongside the wing-clear trio. Add Ahead of the Curve and Cutting Edge for the seasonal prestige pair, and the Mythic-only Primeval Skyfriend as the tier’s rarest prize.
The Story: Why Ula’tek Wakes
Ula’tek is a snake goddess the Amani trolls of Zul’Aman once worshipped — and then spent sixteen thousand years keeping imprisoned. A troll named Zul’jan freed her by accident, and Season 2 is the consequence: the Coiled Isle opening as her cult’s staging ground, the Vaults of Atal’Utek cracking, and the wider Midnight storyline of Zul’jarra hunting Zul’jan running straight through the patch. Community theories tying her to the Old Gods remain just that — theories — but the Amani imagery soaking every corridor of this raid is very much the point.
Walk In Ready — or Walk Out Done
The Venomous Abyss rewards preparation more than any Midnight raid so far: toxin math, egg control and a shrinking platform don’t forgive improvised raid nights. Learn it with this guide, prep with the checklist — and if the season’s short window matters more than the wipe nights, our team clears any difficulty with you or for you, from first pull to the five-headed finish.