



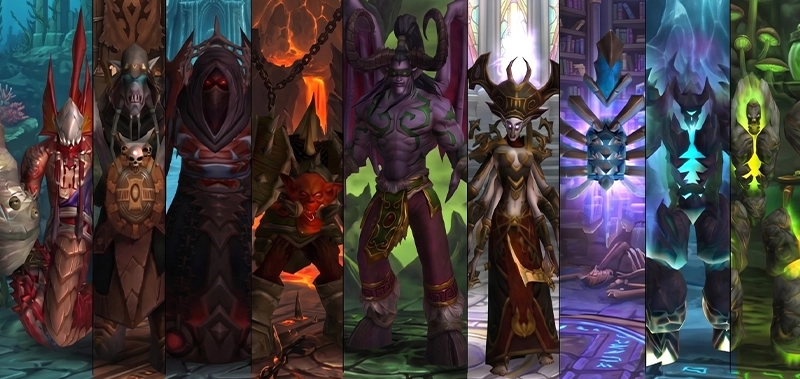
Black Temple is the crown of TBC raiding — nine bosses deep in eastern Shadowmoon Valley, the start of Tier 6, and the fight everyone rolled a character for: Illidan Stormrage at the summit. On TBC Anniversary and Fresh Classic servers the temple opens in Phase 3 alongside Mount Hyjal, and it demands more preparation than anything before it — a full attunement chain, three-tank compositions and a Warlock ready to tank a demon. This guide covers all of it: how to get in, how to prepare, and how every one of the nine bosses actually dies.
 ⤢ Click to enlarge
Black Temple: Quick Facts
How to Get Black Temple Attunement (Fresh Classic)
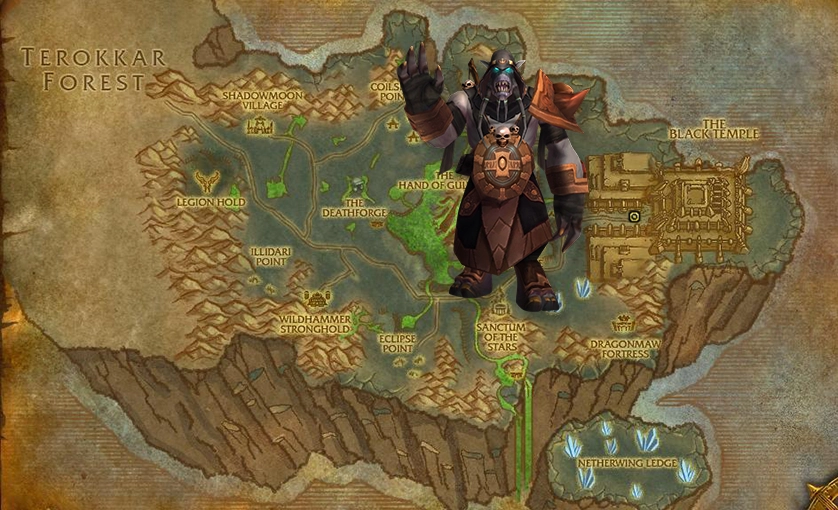
Black Temple’s door only opens for players who’ve earned Akama’s trust. The attunement is a long questline through Shadowmoon Valley that ends with Akama and Maiev breaking you into the temple. Here’s the exact path — where to start, every quest in order, and the NPCs that matter.
Prerequisites
- Level 70
- Declared allegiance with The Aldor or The Scryers in Shattrath
- Attuned to The Arcatraz (the Tempest Keep key chain)
- Attuned to Hyjal Summit (Caverns of Time — itself requiring SSC and TK progress)
Where the Chain Starts
Head to eastern Shadowmoon Valley, the Ata’mal Terrace and Warden’s Cage area near the temple itself. The chain begins with Anchorite Ceyla for Aldor players — Scryers get the mirror version of the same quests from their own questgiver.
Part 1 — Ata’mal Terrace (Shadowmoon Valley)
- Tablets of Baa’ri — collect the Ashtongue tablets around the Ruins of Baa’ri
- Oronu the Elder — slay the corrupted Ashtongue elder at the ruins
- The Ashtongue Corruptors — collect four medallion fragments from the named Ashtongue elites around the valley: Haalum, Eykenen, Lakaan and Uylaru, then return to Ceyla
- The Warden’s Cage — travel to the cage complex in southern Shadowmoon, the chain’s new base
- Proof of Allegiance — pass the Ashtongue deserters’ loyalty test
- Akama — you meet Akama himself at the Warden’s Cage
Part 2 — Seer Olum, Al’ar and Rage Winterchill
Akama sends you after Seer Olum, held in Serpentshrine Cavern: kill Fathom-Lord Karathress and Olum is freed behind him, which turns in The Secret Compromised. Two raid kills follow before the chain moves on. Ruse of the Ashtongue sends you into Tempest Keep to kill Al’ar while wearing the Ashtongue Cowl, and An Artifact From the Past sends you to Hyjal Summit for Rage Winterchill, whose Time-Phased Phylactery turns in back at Akama. Olum’s sacrifice and those two kills are what finally earn Akama’s trust and open the temple chain.
Part 3 — The Akama Chain (Opens the Temple)
- Ruse of the Ashtongue — the raid-type quest that begins the entry chain
- An Artifact From the Past — recover a relic from Rage Winterchill inside Hyjal Summit
- The Hostage Soul — carry the rescued soul to A’dal in Shattrath
- Entry Into the Black Temple — report to Xi’ri at the temple gates
- A Distraction for Akama — given by Xi’ri; Akama and Maiev break into the temple, and this quest opens the entrance for good
Part 4 — After the Illidan Kill
The story pays off past the raid too: Seek Out the Ashtongue, then Redemption of the Ashtongue, and finally The Fall of the Betrayer — turned in once Illidan is down.
Entering the Raid
After A Distraction for Akama, the entrance is a crack in the wall in eastern Shadowmoon Valley that ports the raid into the Karabor Sewers. One quality-of-life note worth the effort — upgrading the Medallion of Karabor into the Blessed Medallion of Karabor gives you a teleport straight inside, and on a 25-man roster that saves real time every raid night. Short on time, or missing the Arcatraz and Hyjal prerequisites? The chain is exactly the kind of chore our attunement service exists for:
 ⤢ Click to enlarge
Raid Preparation
Tier 6 raiding punishes empty consumable bags. Flasks or double elixirs on every pull, health and mana potions, weapon oils and stones, and shadow protection where your healers ask for it — the temple’s damage profile leans dark. Composition matters more than any raid before it, and three requirements are non-negotiable: three tanks for Mother Shahraz’s Saber Lash, a Warlock tank geared and speced for Illidan’s Demon Form, and a Mage ready to spellsteal-tank Zerevor on the Illidari Council. Sort these before Phase 3 opens, not the night of.
Trash Overview
Temple trash respects preparation and punishes autopilot. The Karabor Sewers packs mix casters with melee — assign interrupts and pull back to safe corners. The courtyard and halls beyond run dense humanoid packs where crowd control still earns its keep: sheep, banish and traps mark the difference between a clean clear and a corpse run. Nothing here demands strategy notes, but everything demands that your raid actually uses its kit.
Boss Encounters: All 9 Fights
1. High Warlord Naj’entus
The gatekeeper teaches the temple’s first rule: spread out. Needle Spine chips the raid constantly, and clumping turns chip into carnage. The fight’s signature is Impaling Spine — a random player gets pinned and takes heavy damage until someone frees them, so assign the raid to break spines on sight, fast. Whoever pulls the spine free gets a Naj’entus Spine in their bags, and that item is the only way to break his Tidal Shield. Do not throw it the moment the shield goes up: the shield’s burst hits the whole raid for around 8,500, so healers top everyone to full first, then the spine goes in. Healers stay ahead of the spine targets; everyone else keeps distance discipline.
2. Supremus
A two-phase loop on a 60-second timer. Phase one is tank and spank with homework: dodge the Molten Flame lines, and tanks respect Hateful Strike — off-tanks sit second and third on threat, directly behind the main tank, so the strike lands on them and not on a rogue. Phase two deletes the threat table: Supremus fixates a random player, who runs — genuinely runs — while the raid dodges Volcanic Geysers erupting underfoot. When phase one returns, aggro has reset, so tanks re-establish before DPS opens up. Rinse until the abyssal falls.
3. Shade of Akama
An add fight with a deadline. Phase one: kill the Channelers binding Akama, while Sorcerers stream in to replace them — kill those faster. Nothing needs crowd control or kiting here: tanks gather every add into one pile and the raid cleaves it down. Once the channel breaks, the Shade activates and phase two starts a rough one-minute clock: kill the Shade before it kills Akama, or the encounter resets with your consumables gone. Save cooldowns and lust for the burn.
4. Teron Gorefiend
The fight that spawned a thousand training simulators. Every 30 seconds Shadow of Death marks a player: they die on schedule and return as a Vengeful Spirit with three new buttons — Spirit Lance, Spirit Chains and Spirit Volley — and one job, killing the Shadowy Constructs that otherwise eat the raid. The ghost rotation is fixed: 5, then 4, then spam 3 while swapping targets. Practice it before the pull; a panicking spirit wipes the room. The living keep dealing damage while healers cleanse Incinerate off its targets before the burn stacks. Gorefiend hits hard in melee, so the tank on him is your thickest one. The boss himself is simple — it’s your ghosts who decide the kill.
5. Reliquary of Souls
Three essences, three phases, three different raids’ worth of discipline. Essence of Suffering runs Aura of Suffering — no healing received by the tank’s normal means, so tanks alternate while healers dispel Soul Drain off the raid. Essence of Desire flips the problem: Aura of Desire reflects a slice of your own damage back at you, casters interrupt Spirit Shock on cooldown, and the Rune Shield gets spellstolen by a Mage or purged the moment it appears. Essence of Anger ends it with a threat-sensitive burn: mind Seethe — anyone pulling threat feeds it — and keep the Essence faced away from the raid. Mana refills to full at every phase change, so spend freely inside each one.
6. Gurtogg Bloodboil
A positioning puzzle on rails. In phase one, Bloodboil hits the five players furthest from Gurtogg — so the raid runs a group rotation, trading who eats the stacks while the debuffs drop elsewhere. Tanks alternate through his stacking melee debuffs. Every 90 seconds, phase two: a random player gets Fel Rage and becomes the temporary tank while threat stops mattering — healers pour everything into the Raged player, everyone else burns freely. The Raged player must not press an immunity — no Divine Shield, no Ice Block — or the boss resets onto the raid; a caster under Fel Rage can take Blessing of Protection, since that only stops his melee. Then the rotation resumes. The fight is a spreadsheet that punishes improvisation; assign the groups before the pull.
7. Mother Shahraz
The three-tank check. Saber Lash splits its enormous hit across the closest targets — with fewer than three tanks stacked, someone gets deleted. Every ranged player stands in one spot, against a wall or under a statue, so Fatal Attraction cannot fling them into the air. The three players it grabs break the chain as fast as they can: run away from each other, never back into the raid. Shadow resistance turns this from a wipe fight into a farm fight — 244 shadow resistance is the breakpoint for everyone except the tanks.
8. Illidari Council
Four bosses, one shared health pool, four separate problems. Gathios the Shatterer tanks as the primary target on a standard tank. High Nethermancer Zerevor can’t be tanked normally at all — a Mage holds him by spellstealing his buffs and eating his arcane volleys. Lady Malande undoes your work unless Circle of Healing gets interrupted every single cast — assign a dedicated rotation. Veras Darkshadow vanishes and envenoms; cleanse and carry on. Damage flows into the shared pool, so cleave where possible and hold single-target discipline where it isn’t. The whole raid stays awake for the ground effects — step out of Flamestrike, Blizzard and Consecration the moment they land. The kill lands on all four at once.
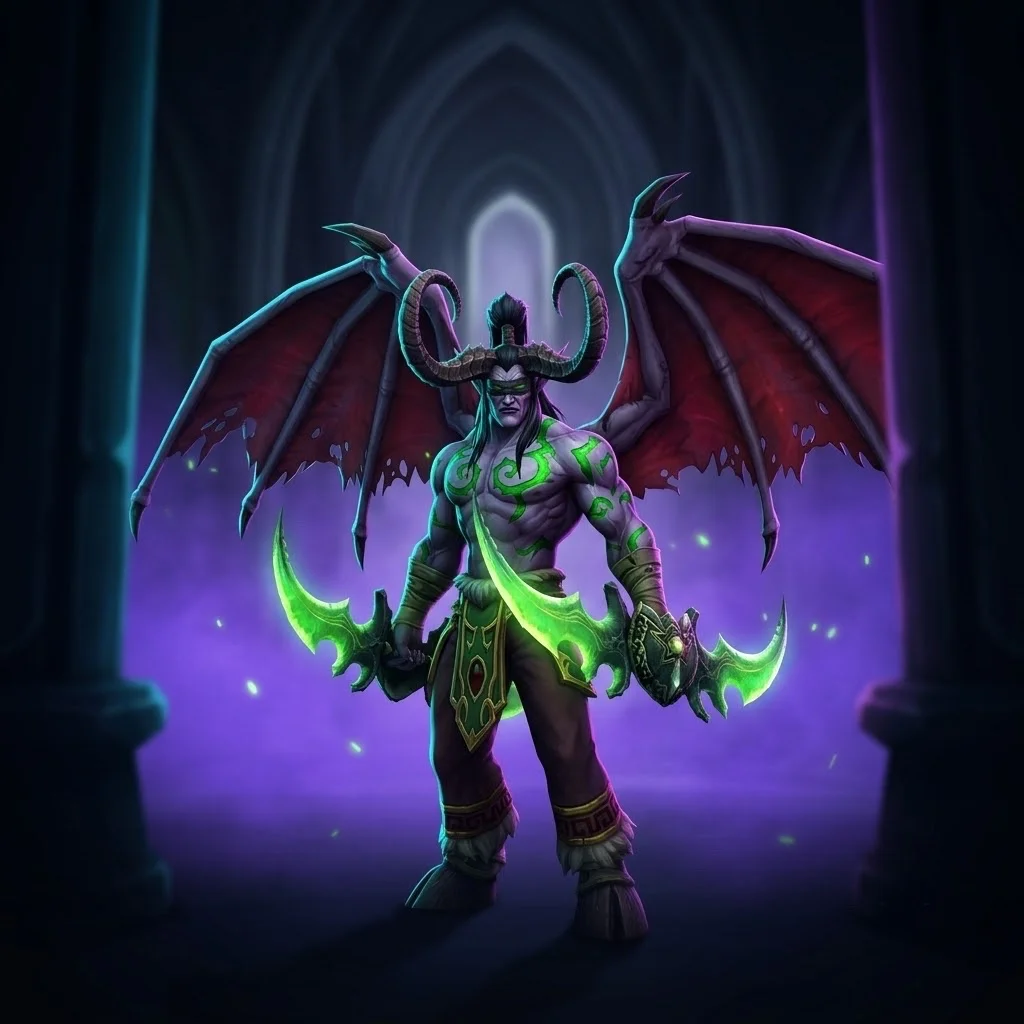
9. Illidan Stormrage
Five phases, one legend. Phase one: only a Warrior or a Paladin tanks him, and every Shear gets a Shield Block — no exceptions. The tank walks him out of each Flame Crash zone as it drops. A player marked with Parasitic Shadowfiend runs out of the raid, or into melee, before it births two adds, and the adds die immediately. Phase two at 65%: Illidan takes flight and nobody tanks him. He hurls both Warglaives down and each spawns a Flame of Azzinoth, and each Flame needs its own fire-resist-capped tank. The rest of the raid stands in the centre split into three groups to keep the area damage survivable. Phase three starts when both Flames are dead and repeats phase one, with one change: the whole raid spreads 5 yards so Agonizing Flames cannot chain. Bloodlust and every damage cooldown go here — the goal is to push him past 30% before phase four, the Demon Form, ever arrives. Phase five at 30% is the same fight again, except Maiev Shadowsong is now dropping Cage Traps: walk him over one and he stands stunned, taking amplified damage, while the raid burns the last of the Betrayer in front of 25 people who will remember it.
Notable Loot: Warglaives, Tier 6 and BiS
Black Temple starts the Tier 6 era: helm, shoulder and chest tokens drop across the back half of the raid, and the non-set table carries multi-phase BiS pieces — Memento of Tyrande for healers and Cursed Vision of Sargeras for melee headline a long list. Above all of it hang the Warglaives of Azzinoth: the twin legendary drops from Illidan himself, main-hand and off-hand on separate low-chance rolls, chased by every Warrior and Rogue on the server. Warglaive runs are a season-long campaign of weekly Illidan kills — which is exactly why they exist as a service.
 ⤢ Click to enlarge
| Item | Slot | Boss | Who Wants It |
|---|---|---|---|
| Warglaive of Azzinoth + Off-Hand | Weapons | Illidan | ? Legendary — Rogue / Fury Warrior BiS pair |
| Zhar’doom, Greatstaff of the Devourer | 2H Staff | Illidan | ? BiS Warlock / Shadow Priest |
| Cursed Vision of Sargeras | Head | Illidan | ? BiS melee DPS |
| The Skull of Gul’dan | Trinket | Illidan | ? BiS caster DPS |
| Memento of Tyrande | Trinket | Illidan | ? BiS healers |
| Crystal Spire of Karabor | Main Hand | Illidan | ? BiS Resto Shaman / healer mace |
| Bulwark of Azzinoth | Shield | Illidan | ? BiS Protection Warrior |
| Black Bow of the Betrayer | Ranged | Illidan | ? BiS Hunter bow |
| Madness of the Betrayer | Trinket | Illidari Council | ? BiS physical DPS |
| The Brutalizer | 1H Weapon | Supremus | ? Top tank threat weapon |
| Waistwrap of Infinity | Waist | Supremus | ? BiS caster DPS belt |
| Staff of Immaculate Recovery | 2H Staff | Gurtogg Bloodboil | ? Strong healer staff |
| Shadowmoon Insignia | Trinket | Gurtogg Bloodboil | ? Tank survivability pick |
| Blade of Savagery | 1H Weapon | Mother Shahraz | ? Off-hand pick |
| T6 Pauldrons (Conqueror / Vanquisher / Protector) | Shoulder token | Mother Shahraz | ? Tier 6 set piece |
| T6 Chestguards (Conqueror / Vanquisher / Protector) | Chest token | Illidan | ? Tier 6 set piece |
| T6 Leggings (Conqueror / Vanquisher / Protector) | Legs token | Illidari Council / trash | ? Tier 6 set piece |
| Blessed Band of Karabor | Finger | Trash | ? Healer ring worth every clear |
 ⤢ Click to enlarge
Is Black Temple Worth Clearing Every Week?
For the whole Tier 6 phase — yes, without hesitation. The temple is the gear engine of Phase 3, the Warglaives only drop from a dead Illidan, and the raid itself is TBC’s best-designed nine hours of content compressed into one instance. Learn it with this guide, or let our TBC Anniversary boosts handle any piece of it — attunement, single kills or the full clear — while the loot lands on your character either way.
Related items
 TBC Anniversary Leveling Guide: The Fast 1–70 Route
  TBC Anniversary Rogue PvP Guide – BiS Gear, Talents and Tips
  Battle for Mount Hyjal Raid Guide — TBC Anniversary / Fresh Classic (All 5 Bosses)
  WoW TBC Anniversary Phase 3 Guide: Black Temple, Mount Hyjal & How to Prepare