The Eye of Tempest Keep is the second T5 raid in TBC Anniversary Phase 2 and the harder of the pair. Four bosses, multiple cleanse-heavy mechanics, a council fight that demands strict coordination, and Kael’thas Sunstrider at the end — one of the most mechanically complex bosses in all of TBC. This guide covers everything: how to get in, boss order, and full tactics for every fight.
The Eye at a Glance
How to Get In
The Eye is located inside the Tempest Keep fortress in northern Netherstorm. The fortress floats above the ground — you fly up to it directly.
- Fly to Tempest Keep in northern Netherstorm — the large floating fortress.
- Land on the entrance platform and enter through the main gate.
- The Eye instance portal is in the central chamber immediately inside.
- Al’ar is the first boss visible on entry — the giant phoenix above the central platform.
Boss Order
TK Attunement — Quick Guide
Tempest Keep requires attunement to enter. The chain has three parts: the Cipher of Damnation, then the Trial of the Naaru, ending with a Magtheridon kill. Completing both the Tempest Keep and Serpentshrine Cavern attunements awards the “Champion of the Naaru” title. Here is the short version.
Step 1 — Cipher of Damnation
A long solo questline in Shadowmoon Valley, given by Oronok Torn-heart and his three sons. You recover three Cipher fragments, one per son.
- Intro (Oronok): Start with The Hand of Gul’dan, then complete the three Enraged Spirits quests (Fire/Earth, Water, Air) by placing the Totem of Spirits before killing the elementals. Finish the intro through the tuber, Flayer Egg, and roleplay quests.
- 1st Fragment (Grom’tor): Travel to Coilskar Point and loot the fragment from a Coilskar Chest.
- 2nd Fragment (Ar’tor): At Illidari Point — kill Painmistress Gabrissa for a key, farm the bow Lohn’goron from demons, then kill Veneratus the Many for the fragment.
- 3rd Fragment (Borak): The longest leg — Eclipse Point. Includes the Arakkoa egg, the Bloodthistle bait to kill Envoy Icarius, farming Eclipsion Armor for a Blood Elf Disguise, and a group kill on Ruul the Darkener.
- Finale: Oronok gives The Cipher of Damnation — kill Cyrukh the Firelord. Completing it mails you a Letter from Shattrath that opens the next chain.
Step 2 — Trial of the Naaru
Once the Letter arrives, speak to A’dal in Shattrath to begin the Trial of the Naaru chain. Each step is a Heroic dungeon objective.
- Mercy — Heroic Shattered Halls. Clear to the Executioner (behind Kargath Bladefist) before he kills the prisoners. Beating the timer drops the quest item.
- Strength — kill the last boss of Heroic Steamvault (Warlord Kalithresh) and Heroic Shadow Labyrinth (Murmur). Each drops one required item.
- Tenacity — Heroic Arcatraz. During the final boss (Harbinger Skyriss), keep Millhouse Manastorm alive until the boss dies to get credit.
Step 3 — Magtheridon
The final step — Trial of the Naaru: Magtheridon.
- Form a raid and kill Magtheridon in Magtheridon’s Lair (Hellfire Citadel).
- Return to A’dal in Shattrath to turn in. You are rewarded with the Phoenix-fire Band ring, The Tempest Key.
Boss Tactics
Phase 1 — until Al’ar dies Al’ar flies between 4 platforms arranged around the central area, moving clockwise to a new platform every 30 seconds. He has no traditional aggro table in Phase 1 — the assigned tank must be on the platform Al’ar lands on to hold him.
- Flame Buffet — only triggers during Phase 1 if no one is within melee range while Al’ar is on a platform. It deals Fire damage and places a debuff increasing Fire damage taken. If this goes off multiple times in a row during Phase 1, it will likely lead to a wipe. Always have a melee or tank in range when Al’ar lands.
- Flame Quills — happens during some transitions between platforms. Instead of flying to a new platform, Al’ar flies to the center of the room and performs a “whirlwind,” shooting Flame Quills at anyone still on the platforms. Tanks should jump off to avoid this damage.
- Embers of Al’ar — spawn periodically throughout Phase 1. Kill them as they appear. When they die they deal 3% of Al’ar’s max HP to him — but save the burst for the transition (see Phase 2 note).
Phase 2 — Rebirth Rebirth triggers at the start of the phase, dealing Fire damage and knocking back all nearby players. Al’ar is now tanked in the center.
- Dive Bomb — Al’ar occasionally flies into the air and Dive Bombs down on a random player. The raid should stay spread at all times to limit the damage.
- Flame Patch — spawns a small area of fire on the ground, dealing Fire damage over time to any player inside and applying a debuff that increases Fire damage taken. Move out of it immediately.
- Melt Armor — places a debuff on the Main Tank reducing their armor by 80%. This is a massive debuff and makes the tank take significant melee damage. Al’ar is tauntable — swap to a different tank whenever this debuff is applied.
- Kill all remaining adds from Phase 1. When an Ember dies it deals 3% of Al’ar’s max HP and explodes, dealing damage and knocking back nearby players. Use the leftover Embers to push Al’ar’s HP during Phase 2.
Void Reaver is a tank-and-spank fight. The entire raid follows the tank on the pull, except for 1–3 Hunters who stay at range and bait Arcane Orb onto themselves, away from the raid.
- Arcane Orb — shoots toward a random player outside of melee range. The orb has a slow travel speed, giving plenty of time to move out of the impact area. If hit, players take Arcane damage and are silenced for 6 seconds. This is why 1–3 Hunters stand at range to bait and dodge orbs away from the raid.
- Pounding — a channeled ability that deals Arcane damage to all players near Void Reaver. It has a very short cooldown and is cast many times throughout the encounter. Healers heal through it constantly.
- Knock Away — punts the player with the most threat backwards and reduces aggro on that target by a significant margin. Because of this, the fight needs many tanks building threat for the entire encounter — the off-tank should always be second on threat to pick up after each Knock Away.
Phase 1 — until 20% All ranged and healers stack in one camp for the entire fight. Solarian stands in the center; melee stay on her.
- Arcane Missiles — targets a random player and channels Arcane damage over time. It cannot be interrupted. Healers must watch for randomly targeted players and heal through it.
- Wrath of the Astromancer — a debuff on a random player that explodes after 6 seconds, dealing around 6,000 damage to the target, sending them into the air, and doing the same to anyone in range. The target itself takes no fall damage on landing — but anyone else hit by it does, which instantly kills them. The marked player must run away from the raid immediately.
- Solarium Portals — every 50 seconds Solarian disappears and multiple rays of light spawn enemies. AoE all adds as fast as possible.
Phase 2 — Transformation at 20% When Solarian reaches 20% total health she transforms into a large Voidwalker. At this point there are no special mechanics to manage — simply nuke the boss down.
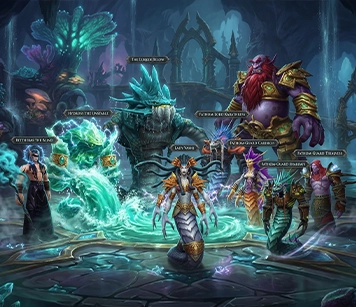
Phase 1 — The Council Before engaging Kael’thas himself, you deal with each member of his council — first one at a time, then all together later.
- Thaladred the Darkener — has no threat table and Fixates on random players, slowly moving toward them. Kill him in the back of the room.
- Lord Sanguinar — Bellowing Roar fears all nearby players. It has a cast time and cannot be interrupted. Tanks should have Fear Ward and Tremor Totem nearby; ranged stand at max range to avoid the fear.
- Grand Astromancer Capernian — tanked by a Warlock more than 30 yards away. She casts Arcane Explosion if players are within melee range, and also casts Conflagration on random players within 30 yards — which should be soaked by a tank.
- Master Engineer Telonicus — tank and spank. Places Remote Toy on random players, periodically stunning them for 4 seconds.
Phase 2 — Weapons Begins when Telonicus is killed. Seven legendary weapons spawn that must be killed.
- Bow — tanked by a Ranged DPS, facing it away from the raid to avoid Multi-Shot.
- Axe — tanked off to the side to avoid Whirlwind, killed by Ranged DPS.
- Staff — should be interrupted at the start of the phase.
- Tanks should try to stack all weapons except the Axe for better AoE. Everyone loots their appropriate weapon immediately when it dies.
Phase 3 — Advisors return Begins 2 minutes after Phase 2 starts. Kael’thas resurrects all advisors. Kill order: all ranged DPS on Thaladred → Capernian; all melee DPS on Telonicus → Sanguinar.
- The tank on Sanguinar can use the legendary Shield ability to become immune to fears.
- Casters with the legendary Staff can use its ability to make all players within 30 yards immune to Stun, Silence, and Disorient effects — preventing a lot of the mechanics.
Phase 4 — Kael’thas joins Begins 3 minutes after Phase 3 starts, with Kael’thas entering the fight. Set up an interrupt rotation for Fireball. Avoid Flamestrike — massive AoE damage on the floor.
- Mind Control — Ranged players should stack in one camp to break mind-controlled players as fast as possible. Melee DPS and Hunters with the legendary Dagger should use a low-damage melee ability to break it.
- Phoenix — Kael’thas spawns a Phoenix that must be tanked away from him and killed by Ranged DPS. When it dies it turns into an egg that must be killed within 15 seconds or the Phoenix respawns.
- Shock Barrier — an absorb shield Kael’thas applies to himself. It lasts 10 seconds, and while active his spells cannot be interrupted. Whenever he uses it, the raid must burn through the shield so the next Fireball or Pyroblast can be interrupted.
- Pyroblast — a 4-second cast dealing around 50,000 Fire damage to the target. It can be interrupted, but Kael’thas only casts it directly after a Shock Barrier. Typically the Main Tank receiving the Pyroblast uses the legendary Phaseshift Bulwark shield to absorb the first one.
Phase 5 — below 50% Begins when Kael’thas reaches 50% health. He no longer casts Mind Control or Pyroblast.
- Gravity Lapse — teleports the entire raid to Kael’thas and gives them the ability to fly for 30 seconds.
- Nether Vapor — black clouds in the air around Kael’thas that apply a stacking debuff reducing the total health of any player who touches them. Avoid the Nether Vapor while airborne.
- Gravity Lapse ends after 30 seconds — make sure you are close to the ground before it ends to minimize fall damage. Then burn the boss.
Notable Loot
Al’ar — Loot
| Item | Type / Slot | Best for |
|---|---|---|
| Talon of Al’ar | Trinket | Hunter |
| Tome of Fiery Redemption | Trinket | Prot PaladinBiS Alt |
| Band of Al’ar | Ring / Finger | Shadow PriestBiS |
| Phoenix-Ring of Rebirth | Ring / Finger | HealerBiS Alt |
| Phoenix-Wing Cloak | Cloak / Back | TankBiS |
| Mindstorm Wristbands | Cloth / Wrist | Caster DPSBiS |
| Gloves of the Searing Grip | Leather / Hands | Feral Druid / Ret PaladinBiS |
| Fire Crest Breastplate | Mail / Chest | Resto Shaman / Holy PaladinBiS Alt |
| Netherbane | 1H Axe | Enh. ShamanBiS Alt |
| Claw of the Phoenix | Fist Weapon (Off-hand) | HunterBiS Alt |
| Talon of the Phoenix | Fist Weapon (Main-hand) | Enh. ShamanBiS |
| Arcanite Steam-Pistol | Gun | RogueBiS |
| Talisman of the Sun King | Off-hand | Holy PaladinBiS |
Void Reaver — Loot
| Item | Type / Slot | Best for |
|---|---|---|
| Warp-Spring Coil | Trinket | RogueBiS |
| Fel Reaver’s Piston | Trinket | Healer |
| Cowl of the Grand Engineer | Cloth / Head | Shadow PriestBiS |
| Girdle of Zaetar | Leather / Waist | Resto DruidBiS Alt |
| Void Reaver Greaves | Mail / Legs | Enh. Shaman / HunterBiS Alt |
| Fel-Steel Warhelm | Plate / Head | Melee DPS |
| Wristguards of Determination | Plate / Wrist | TankBiS |
| Pauldrons of the Vanquished Champion | T5 Shoulders — Paladin, Rogue, Shaman | Tier token |
| Pauldrons of the Vanquished Defender | T5 Shoulders — Warrior, Priest, Druid | Tier token |
| Pauldrons of the Vanquished Hero | T5 Shoulders — Hunter, Mage, Warlock | Tier token |
Solarian — Loot
| Item | Type / Slot | Best for |
|---|---|---|
| Solarian’s Sapphire | Trinket | Warrior DPS |
| Void Star Talisman | Trinket | Warlock PvP |
| Trousers of the Astromancer | Cloth / Legs | Shadow PriestBiS |
| Star-Soul Breeches | Cloth / Legs | HealerBiS Alt |
| Vambraces of Ending | Leather / Wrist | Feral Druid / RogueBiS |
| Star-Strider Boots | Mail / Feet | HunterBiS Alt |
| Worldstorm Gauntlets | Mail / Hands | Resto ShamanBiS |
| Boots of the Resilient | Plate / Feet | TankBiS |
| Greaves of the Bloodwarder | Plate / Legs | Ret PaladinBiS Alt |
| Girdle of the Righteous Path | Plate / Waist | Holy PaladinBiS |
| Heartrazor | 1H Dagger | RogueBiS |
| Ethereum Life-Staff | 2H Staff | Resto Druid / HealerBiS |
| Wand of the Forgotten Star | Wand | Caster DPSBiS Alt |
Kael’thas — Loot
| Item | Type / Slot | Best for |
|---|---|---|
| Ashes of Al’ar | Mount | Mount — rare drop |
| Verdant Sphere | Quest Item | Epic neck questline |
| Kael’s Vial Remnant | Quest Item | All — Hyjal attunement |
| Band of the Ranger-General | Ring / Finger | Hunter / Rogue / WarriorBiS |
| Sunshower Light Cloak | Cloak / Back | Holy Priest / Resto DruidBiS |
| Royal Cloak of the Sunstriders | Cloak / Back | Mage / Shadow PriestBiS |
| Thalassian Wildercloak | Cloak / Back | Melee DPSBiS |
| Gauntlets of the Sun King | Cloth / Hands | Arcane MageBiS |
| Crown of the Sun | Cloth / Head | Holy PriestBiS Alt |
| Leggings of Murderous Intent | Leather / Legs | Rogue / FeralBiS |
| Sunhawk Leggings | Mail / Legs | Resto Shaman / Holy PaladinBiS Alt |
| Royal Gauntlets of Silvermoon | Plate / Hands | Prot WarriorBiS |
| Rod of the Sun King | 1H Mace | Enh. Shaman / Fury WarriorBiS |
| The Nexus Key | 2H Staff | Caster DPSBiS |
| Twinblade of the Phoenix | 2H Sword | HunterBiS |
| Chestguard of the Vanquished Champion | T5 Chest — Paladin, Rogue, Shaman | Tier token |
| Chestguard of the Vanquished Defender | T5 Chest — Warrior, Priest, Druid | Tier token |
| Chestguard of the Vanquished Hero | T5 Chest — Hunter, Mage, Warlock | Tier token |
Tier 5 Tokens
| Token | Classes | Drops from |
|---|---|---|
| Vanquished Hero | Hunter, Mage, Warlock | Void Reaver, Kael’thas |
| Vanquished Defender | Warrior, Priest, Druid | Void Reaver, Kael’thas |
| Vanquished Champion | Paladin, Rogue, Shaman | Void Reaver, Kael’thas |