Serpentshrine Cavern is the real gear check of TBC Anniversary Phase 2. Karazhan lets you get away with sloppy play — SSC does not. Six bosses, strict mechanics, resist requirements on key fights, and Lady Vashj at the end who is still one of the most demanding encounters Blizzard ever designed. This guide covers everything: how to get in, boss order, resist requirements, and full tactics for every fight.
SSC at a Glance
How to Get In
Serpentshrine Cavern is located inside Coilfang Reservoir in Zangarmarsh — the large elevated island with a glowing pool in the center of the zone.
- Fly to the Coilfang Reservoir island in central Zangarmarsh.
- Jump into the glowing pool and swim straight down to the bottom.
- Two portals at the bottom: left = The Steamvault (5-man), right = Serpentshrine Cavern (25-man).
- Enter the right portal to zone into the raid instance.
- First boss, Hydross, is straight ahead down the ramp.
Boss Order
Resist Requirements
Only two bosses in SSC require resist gear. Lady Vashj requires no resists at all — come in your normal progression gear.
| Boss | Who needs it | School | Recommended |
|---|---|---|---|
| Hydross the Unstable | Tank only | Frost & Nature | 275+ |
| Leotheras the Blind | Warlock tank only | Fire only | 250+ |
SSC Attunement — Quick Guide
Serpentshrine Cavern requires attunement to enter. The questline is short, but its prerequisites are not — you first need the Karazhan attunement done and Revered with Cenarion Expedition for the Heroic key. Completing both the SSC and Tempest Keep attunement chains awards the “Champion of the Naaru” title. Here is the short version.
Step 1 — Start the Quest
The chain begins inside Heroic The Slave Pens, with a captured Naga prisoner.
- Enter Heroic Slave Pens (requires the Reservoir Key — Revered with Cenarion Expedition).
- Defeat the first boss, Mennu the Betrayer, to reach the prisoner.
- Find Skar’this the Heretic in the central holding area — he offers the quest The Cudgel of Kar’desh.
- He tasks you with retrieving two signets — one from Gruul, one from Nightbane.
Step 2 — Gruul & Nightbane
Both signets are simple quest drops — just kill the bosses and loot them. Bring free bag space.
- Earthen Signet — drops from Gruul the Dragonkiller in Gruul’s Lair.
- Blazing Signet — drops from Nightbane in Karazhan. One player in your group must have completed the Karazhan quest chain to summon him.
Step 3 — Turn In
With both signets in hand:
- Return to Skar’this the Heretic in Heroic Slave Pens and turn in The Cudgel of Kar’desh.
- He casts a permanent blessing on you that allows entry to Serpentshrine Cavern.
Boss Tactics
Phase 1 — Frost Form Hydross starts at the north mark. Resist recommendation is 330+ with consumables, auras and totems — 275 prevents one-shots but the boss is still very difficult to survive at that threshold. Mark of Hydross is a stacking debuff that increases Frost damage taken by 10%, 25%, 50%, 100%, 250%, and 500% — one stack every 15 seconds.
- Main tank holds Hydross at the north mark. Hydross is immune to taunt — phase transitions are triggered by walking the boss across the dividing mark, not by taunting.
- Tank gear requirement: In addition to resist caps, both resist tanks must be crit immune. Crit immunity is reached via Defense rating or Resilience — without it the boss will crit through resist sets and kill the tank.
- At 6 stacks the active tank walks Hydross south across the mark. Aggro fully resets on transition — the off-tank in the Nature resist set picks him up via Misdirection from hunters or direct damage.
- Water Tomb — cast on a random player during Frost Form, stunning all players within 8 yards and dealing Frost damage over time. The entire raid must spread at least 8 yards apart during Frost Form at all times.
- Transition spawns 4 elementals — all DPS swap off the boss and burn adds before they reach healers. Warlocks Banish any adds out of melee range.
Phase 2 — Nature Form Identical loop in Nature resist gear. Off-tank holds at south mark, 6 stacks of Mark of Corruption, then walks back north. Repeat until dead.
- Every transition spawns a new add wave. One add reaching the healers means a wipe.
- Healers pre-position near the transition point — spike damage on the transitioning tank is immediate.
Main Phase The main tank stays in the water at the center pool, back against the wall, under a Warlock’s underwater breathing buff. Healers spread evenly around the outer edge of the central platform to avoid chaining Geyser hits. Melee DPS spread around the central platform at max melee range — use the small pillars on the platform as backstops. All ranged DPS move to the three outer platforms.
- Spout — rotating water beam. Melee who aren’t confident can jump into the water next to the boss and continue dealing damage during Spout.
- Whirl — physical knockback on all melee. Don’t stand at a platform edge.
- Geyser — targets a random player for AoE knockback. Healers spread on the outer edge of the central platform to avoid chains.
- Ranged adds on outer platforms — hunters can pre-place traps at the exact spawn location before the transition. All adds spawn in the same spot every time. Ranged CC/kill 1–2, melee on central platform kill melee adds that spawn at the torches. Adds cleave — tanks must face them toward the center.
Submerge Phase Lurker dives. Melee adds spawn at the torches on the central platform, ranged adds spawn on outer platforms simultaneously.
- Tanks on central platform pick up melee adds immediately and face them away from the raid.
- Ranged CC and burn outer platform adds before Lurker resurfaces.
- The submerge phase ends on a timer — Lurker resurfaces regardless of whether adds are dead. Boss immediately Spouts starting from the main tank’s position, rotating in a random direction. Kill remaining adds fast.
Pull — Three adds The fight begins with killing 3 adds. They are soft but use AoE Mind Blast. The entire raid must survive this phase — deaths here make the main fight much harder.
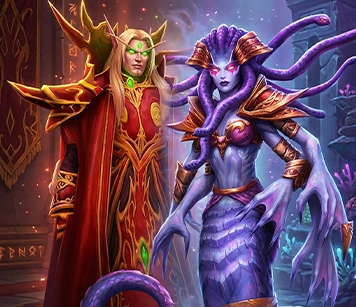
Human Form There is no dedicated main tank on Leo — three tanks constantly build threat. Leo randomly casts Bladestorm — a charge to a player’s position at cast time.
- During Bladestorm: cloth wearers simply run. Bladestorm and its DoT deal physical damage. Paladins can BoP healers to save them during this phase.
- Never apply DoTs or direct damage at the very end of a Bladestorm cast — aggro fully resets when Bladestorm ends. Save Misdirections for after the reset.
- Chaos Blast — Fire damage on the highest-threat target. This is why the Warlock tank is mandatory.
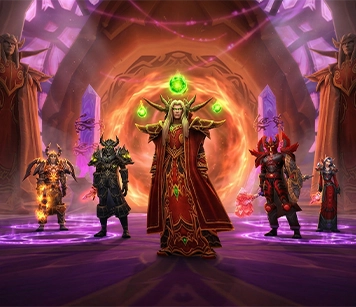
Demon Form Leo transforms. The Warlock tank in Fire resist gear takes over immediately. Nobody stands near the Warlock tank — the boss deals AoE fire damage around the tank and stacks a Fire damage debuff. Once the Warlock builds threat, use Bloodlust.
- Insidious Whisper — marks several players and spawns Inner Demons. Kill your own demon immediately — 2–3 hits. Inner Demons take extra damage from Holy school spells. If a healer is marked, use Smite/Holy Nova rather than Shadow spells. If someone fails and gets mind-controlled, Battle Res them immediately — since a recent nerf this is now possible.
- Demon form ends after ~45 seconds. Human form reactivates — tanks re-establish threat, Warlock steps back.
Below 15% — Split Phase Both Human and Demon forms are active simultaneously. Ignore the Demon form — focus all DPS on the Human form and burn it down. At this HP level most mechanics can be ignored. The Human form has low health.
This is the hardest tank and healer fight in SSC — Karathress was never nerfed. A main tank can take 15,000+ damage in 2 seconds. Bring 4 tanks minimum, a 5th is a safety net. Gear your tanks for maximum HP and survivability — threat stats are irrelevant here.
Karathress has three advisors: Fathom-Guard Tidalvess (shaman), Fathom-Guard Sharkkis (hunter), and Fathom-Guard Caribdis (priest healer). Each needs their own tank.
Kill order Tidalvess → Sharkkis → Caribdis → Karathress
- Tidalvess first — cleave with Sharkkis. Kill Spitfire Totems the instant they spawn (/target Spitfire Totem macro). He deals ~8,000 Frost damage to the tank and can Stormstrike. After his death the main boss inherits only Spitfire Totem.
- Sharkkis second — his pet is either an Elemental (Warlocks can Banish it) or a Beast. 3 tanks total are sufficient: one on Caribdis, one on Karathress, one on Tidalvess and Sharkkis together. He applies Bestial Wrath as an enrage. After death the main boss inherits Bestial Wrath.
- Caribdis third — her tank pulls her behind a pillar and kites her out of line of sight of the other advisors from the pull. She periodically heals a random target including the main boss for 30% max HP — this heal ignores distance and LoS. Interrupt every cast without exception. Also applies a stun AoE around herself — both the tank’s preferred choice is Warrior, healer’s preferred is Shaman (melee and ranged interrupt options). She is brought back to the main camp only when Sharkkis is at ~10%. After her death the main boss inherits her stun AoE.
- A tornado constantly patrols the room and knocks players airborne, slowing cast speed. Watch for it — if it moves into melee, reposition the boss.
- Once all three advisors are dead, burn Karathress. If any advisor is still alive when the boss drops below 80% HP, he enrages.
Assign 3 dedicated healers to spam the main tank non-stop — this boss hits extremely hard. Tank positioning: boss at the column near the entrance, ranged and healers at the opposite column near the entrance.
Phase 1 — above 25%
- Tidal Wave — frontal cleave dealing ~4,000 damage and slowing attack speed. Must land only on the tank. Never reposition the boss incorrectly.
- Watery Grave — teleports 5 random players to the room edges for ~5,000 damage, then immediately Earthquake hits for another ~5,000. Assign one healer exclusively to topping these players the moment they reappear.
- Murloc waves — two packs spawn simultaneously from both room corridors and start building aggro on healers while still in the hallway. Two free tanks intercept them, drag them under the boss, and let AoE (Arcane Explosion, Seed of Corruption) kill them. Murlocs have ~20,000 HP and die fast.
Phase 2 — below 25%
- Watery Grave stops. Water Globules spawn from the center of the room and move toward fixed player positions dealing ~6,000 damage and a 3-second stun on contact. Globules cannot be killed — players must move out of their path.
- At 25% the main tank begins moving the boss to the far corner of the room. Globules must cross the maximum distance — giving players maximum time to avoid them.
- Murloc waves continue throughout the entire fight — the murloc mechanics do not stop at 25%. Keep executing the same intercept and AoE routine while simultaneously avoiding Globules and burning the boss.
Pull Vashj has an enormous aggro radius. Only the tank runs in — everyone else waits until the tank reaches the boss. Give the tank full stacks of HoTs, shields, and cooldowns before the pull. Vashj immediately shoots anyone who gets close before the tank establishes aggro.
Phase 1 — above 70% Two mechanics to manage. Assign two Shamans to the tank group who alternate placing Grounding Totem — Shock Blast hits for 8–10,000 on the tank and the boss’s cooldown is shorter than a single Grounding Totem’s duration. Never have two Grounding Totems up at once or both get consumed by one cast.
- Shock Blast — 8–10,000 Nature damage on the tank. Absorbed by Grounding Totem. Two Shamans alternate — never overlap.
- Static Charge — debuff dealing 2,500–3,000 damage per second to all nearby players. The affected player immediately runs out of the raid. Entangle roots players randomly — a player with Static Charge who gets rooted cannot move away. Assign 3 Paladins: two always ready to give Freedom to the tank (restore the normal Paladin buff immediately after), one exclusively for melee DPS who get Static Charge. Everyone else handles their own roots.
Phase 2 — 70% to 50% Vashj becomes immune to all damage and returns to center. She targets a random player and fires a 90-degree frontal AoE cone for 2,000–3,000 damage. The platform splits into 4 zones around the pylons — stay in separate zones.
- Coilfang Elites — tankable melee adds. Tank them at the boss in the center of the platform so cleave hits no one.
- Coilfang Striders — cannot be tanked, fears everyone nearby. Kited around the outer edge by a Warlock (Curse of Exhaustion) or Elemental Shaman (Frost Shock). Warriors can melee them under Berserker Rage.
- Coilfang Elementals — walk toward Vashj and give her a 5% damage buff per add that reaches her. Kill them as they climb up to the platform level — after the nerf their HP is low enough.
- Tainted Elementals — spawn every 30 seconds, live 15 seconds, spit poison at nearby players. Every nearby DPS immediately switches and kills it. Loot the Tainted Core — it roots the carrier but can be thrown to the next player via macro. Relay the core to a player at a Shield Generator to deactivate it. Do not deactivate the last generator until all elite adds are dead.
- 4 Cores deactivate 4 Generators — Vashj becomes vulnerable and Phase 3 begins.
Phase 3 — below 50% Phase 1 mechanics resume plus Spore Bats. All ranged DPS kill the first wave of Spore Bats — after that ignore them and burn Vashj. The platform fills with void zones over time, so speed matters.
- Shock Blast + Grounding Totem — same two-Shaman rotation as Phase 1.
- Static Charge + Entangle — same Paladin Freedom rotation as Phase 1.
- Forked Lightning — chains between nearby players. Spread out.
- Healers will be near OOM from Phase 2. Use Innervate, Mana Tide Totem, and mana potions immediately.
- Use all offensive cooldowns and Bloodlust / Heroism. Vashj hits harder below 20% — full burn.
Notable Loot
Trash — Loot
| Item | Type / Slot | Best for |
|---|---|---|
| Spyglass of the Hidden Fleet | Trinket | Tank |
| Pendant of the Perilous | Neck | Melee DPS |
| Totem of the Maelstrom | Relic | Shaman Healer |
| Boots of Courage Unending | Plate / Feet | Holy PaladinBiS |
| Wildfury Greatstaff | 2H Staff | Druid TankBiS |
Hydross — Loot
| Item | Type / Slot | Best for |
|---|---|---|
| Living Root of the Wildheart | Trinket | Druid |
| Scarab of Displacement | Trinket | TankBiS Alt |
| Band of Vile Aggression | Ring / Finger | Melee DPS / PvP |
| Ring of Lethality | Ring / Finger | Rogue / Feral / Enh. ShamanBiS |
| Robe of Hateful Echoes | Cloth / Chest | Caster DPSBiS Alt |
| Boots of the Shifting Nightmare | Cloth / Feet | Shadow PriestBiS Alt |
| Wraps of Purification | Cloth / Wrist | HealerBiS Alt |
| Shoulderpads of the Stranger | Leather / Shoulder | Ret Paladin / Enh. ShamanBiS |
| Ranger-General’s Chestguard | Mail / Chest | HunterBiS Alt |
| Blackfathom Warbands | Mail / Wrist | Resto ShamanBiS |
| Brighthelm of Justice | Plate / Head | Holy Paladin |
| Pauldrons of the Wardancer | Plate / Shoulder | Melee DPS |
| Fathomstone | Off-hand | Caster DPS |
| Idol of the Crescent Goddess | Relic | Resto Druid |
The Lurker Below — Loot
| Item | Type / Slot | Best for |
|---|---|---|
| Earring of Soulful Meditation | Trinket | Priest HealerBiS |
| The Seal of Danzalar | Ring / Finger | Prot Paladin / Caster PvP |
| Ancestral Ring of Conquest | Ring / Finger | Melee DPSBiS Alt |
| Choker of Animalistic Fury | Neck | Melee DPSBiS Alt |
| Velvet Boots of the Guardian | Cloth / Feet | Caster DPSBiS Alt |
| Cord of Screaming Terrors | Cloth / Waist | Caster DPSBiS Alt |
| Boots of Effortless Striking | Leather / Feet | RogueBiS Alt |
| Grove-Bands of Remulos | Leather / Wrist | Resto DruidBiS |
| Tempest-Strider Boots | Mail / Feet | Healer Shaman / PaladinBiS Alt |
| Glowing Breastplate of Truth | Plate / Chest | Holy PaladinBiS Alt |
| Bracers of Eradication | Plate / Wrist | Fury WarriorBiS |
| Mallet of the Tides | 1H Mace | Prot WarriorBiS |
| Libram of Absolute Truth | Relic | Holy Paladin |
Leotheras — Loot
| Item | Type / Slot | Best for |
|---|---|---|
| Gloves of the Vanquished Champion | T5 Gloves — Paladin, Rogue, Shaman | Tier token |
| Gloves of the Vanquished Defender | T5 Gloves — Warrior, Priest, Druid | Tier token |
| Gloves of the Vanquished Hero | T5 Gloves — Hunter, Mage, Warlock | Tier token |
| Tsunami Talisman | Trinket | Melee DPSBiS |
| Orca-Hide Boots | Leather / Feet | Resto DruidBiS Alt |
| Grove-Bands of Remulos | Leather / Wrist | Resto DruidBiS |
| Coral-Barbed Shoulderpads | Mail / Shoulder | Resto ShamanBiS Alt |
| True-Aim Stalker Bands | Mail / Wrist | Enh. ShamanBiS |
| Girdle of the Invulnerable | Plate / Waist | TankBiS |
| Fang of the Leviathan | 1H Sword | Prot Paladin / WarlockBiS |
Karathress — Loot
| Item | Type / Slot | Best for |
|---|---|---|
| Leggings of the Vanquished Champion | T5 Legs — Paladin, Rogue, Shaman | Tier token |
| Leggings of the Vanquished Defender | T5 Legs — Warrior, Priest, Druid | Tier token |
| Leggings of the Vanquished Hero | T5 Legs — Hunter, Mage, Warlock | Tier token |
| Fathom-Brooch of the Tidewalker | Trinket | Resto ShamanBiS |
| Sextant of Unstable Currents | Trinket | Caster DPSBiS |
| Frayed Tether of the Drowned | Neck | TankBiS |
| Soul-Strider Boots | Cloth / Feet | Heal PriestBiS |
| Bloodsea Brigand’s Vest | Leather / Chest | RogueBiS Alt |
| World Breaker | 2H Mace | Ret PaladinBiS Alt |
Morogrim — Loot
| Item | Type / Slot | Best for |
|---|---|---|
| Serpent-Coil Braid | Trinket | MageBiS |
| Band of the Vigilant | Ring / Finger | Healer PvP |
| Ring of Sundered Souls | Ring / Finger | TankBiS Alt |
| Pendant of the Lost Ages | Neck | Caster DPS / Prot Paladin |
| Razor-Scale Battlecloak | Cloak / Back | Melee DPSBiS Alt |
| Illidari Shoulderpads | Cloth / Shoulder | Caster DPSBiS Alt |
| Gnarled Chestpiece of the Ancients | Leather / Chest | Resto DruidBiS Alt |
| Mantle of the Tireless Tracker | Mail / Shoulder | HunterBiS Alt |
| Girdle of the Tidal Call | Mail / Waist | Enh. ShamanBiS Alt |
| Warboots of Obliteration | Plate / Feet | Ret Paladin / Fury WarriorBiS |
| Pauldrons of the Argent Sentinel | Plate / Shoulder | Holy PaladinBiS Alt |
| Talon of Azshara | 1H Sword | Rogue / WarriorBiS |
| Luminescent Rod of the Naaru | Wand | Heal PriestBiS |
Lady Vashj — Loot
| Item | Type / Slot | Best for |
|---|---|---|
| Helm of the Vanquished Champion | T5 Helm — Paladin, Rogue, Shaman | Tier token |
| Helm of the Vanquished Defender | T5 Helm — Warrior, Priest, Druid | Tier token |
| Helm of the Vanquished Hero | T5 Helm — Hunter, Mage, Warlock | Tier token |
| Prism of Inner Calm | Trinket | Any DPS |
| Coral Band of the Revived | Ring / Finger | HealerBiS Alt |
| Ring of Endless Coils | Ring / Finger | WarlockBiS |
| Vestments of the Sea-Witch | Cloth / Chest | WarlockBiS |
| Runetotem’s Mantle | Leather / Shoulder | Resto DruidBiS Alt |
| Belt of One-Hundred Deaths | Leather / Waist | Melee DPS / HunterBiS |
| Cobra-Lash Boots | Mail / Feet | Hunter / Ret Paladin / Enh. ShamanBiS |
| Krakken-Heart Breastplate | Plate / Chest | Fury WarriorBiS Alt |
| Glorious Gauntlets of Crestfall | Plate / Hands | Holy PaladinBiS |
| Fang of Vashj | 1H Dagger | Assassination RogueBiS |
| Lightfathom Scepter | 1H Mace | HealerBiS |
| Serpent Spine Longbow | Bow | Hunter / WarriorBiS |
| Nether Vortex | Crafting Material | Crafters |
Recipes
All bosses in SSC have a chance to drop valuable crafting recipes. These are world drop-style recipes exclusive to SSC trash and bosses.
| Recipe | Profession | Slot |
|---|---|---|
| Pattern: Belt of Blasting | Tailoring | Waist |
| Pattern: Belt of the Long Road | Tailoring | Waist |
| Pattern: Boots of Blasting | Tailoring | Feet |
| Pattern: Boots of the Long Road | Tailoring | Feet |
| Pattern: Belt of Deep Shadow | Leatherworking | Waist |
| Pattern: Belt of Natural Power | Leatherworking | Waist |
| Pattern: Belt of the Black Eagle | Leatherworking | Waist |
| Pattern: Boots of the Crimson Hawk | Leatherworking | Feet |
| Pattern: Hurricane Boots | Leatherworking | Feet |
| Plans: Belt of the Guardian | Blacksmithing | Waist |
| Plans: Red Belt of Battle | Blacksmithing | Waist |
| Plans: Boots of the Protector | Blacksmithing | Feet |
Tier 5 Tokens
| Token | Classes | Drops from |
|---|---|---|
| Fallen Hero | Hunter, Shaman, Warrior | Leotheras, Karathress, Vashj |
| Fallen Defender | Druid, Priest, Rogue | Leotheras, Karathress, Vashj |
| Fallen Champion | Mage, Paladin, Warlock | Leotheras, Karathress, Vashj |