The Evolution of Mount Collecting in WoW Midnight Meta
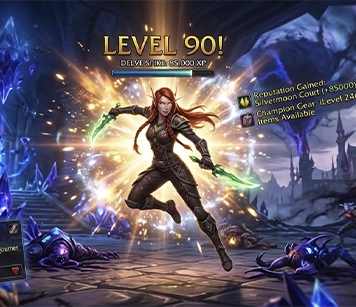
Collecting mounts in the WoW Midnight expansion has shifted away from pure random drops toward exploration-based rewards and environmental puzzles. Many of the most visually striking additions to your stable are tied to the updated Skyriding system or specific zone achievements that take only a few hours to complete. These mounts serve as trophies of your mastery over the verticality introduced in Harandar and Voidstorm.
Securing these rewards early allows you to navigate endgame content with style while ensuring you stay ahead on account-wide achievements. Because many of these items require interacting with hidden treasures or specific quest chains, knowing the exact mechanics and locations is essential to bypass the competition in a crowded launch environment.
Farming environmental puzzles and hunting down dozens of hidden glyphs takes valuable time away from leveling and gearing. A professional WoW Mount Boost Services from a secured provider can handle this grind for you. These experts securely navigate your account to unlock rare mounts efficiently, allowing you to enjoy your new collection without the stress of manual farming.
Essential Mounts to Secure Guide in WoW Midnight
Relinquished Scarlet Charger for Relinquishing Relics
Relinquished Scarlet Charger is the updated Crusader Horse is a high-definition reimagining of the classic Paladin charger. While it shares the aesthetic of a holy warhorse, it is not restricted to Paladins. Any class on your account can ride it.

Progress through the main campaign until you are prompted to choose your leveling path. Select the Arator storyline. After approximately 15 minutes of questing in this specific narrative, pick up the quest Relinquishing Relics. Completing this mid-campaign quest rewards you with the mount immediately. You do not need to finish the entire zone’s storyline to unlock it.

Crimson Dragonhawk for Skyriding Glyph Hunter
Mount Crimson Dragonhawk is the ultimate reward for mastering the sky. To earn this mount, complete the Midnight Glyph Hunter achievement by collecting all 42 hidden skyriding glyphs.

Fly through Eversong Woods to collect 11 glyphs.

Next, move to Zul’Aman to grab another 11 glyphs hidden among the ruins.

Head to Harandar to find 9 glyphs, paying close attention to the top-left section of the map where one glyph sits extremely high in the sky.

Finally, navigate Voidstorm to collect the remaining 11 glyphs.

A flavor text warning will appear on your screen when you fly close to a hidden glyph. Use a Warping Device to randomly teleport into locked zones if you have not unlocked them naturally through the campaign.

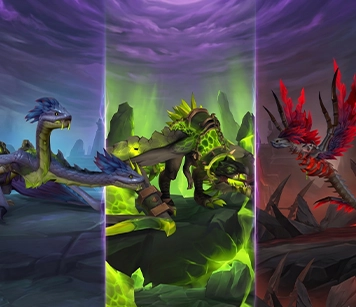
Ancestral War Bear for Honored Warrior’s Cache
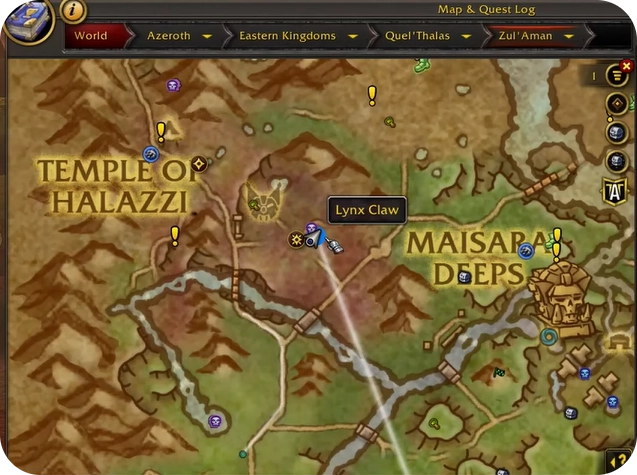
The Ancestral War Bear is a standout reward located in the southern region of Zul’Aman.

Navigate to the giant tree at the southern end of the map. Approach from the southern side to find a small opening at the base, leading inside to the locked Honored Warrior’s Cache. Interacting with it puts you into a special phase where you must defeat four elite spirits.

Travel east to locate the first urn, defeat the elite, and loot the Eagle Talon.

Fly to the western side of the zone to a rocky outstretch in the middle of the river. Click the second urn to summon the next elite and loot the Bear Tooth.

Proceed to the top-left corner of the region, interact with the third urn sticking out of the ground, and claim the Lynx Claw.
Finally, navigate to the top-right side of the map near a large tree to find the fourth urn for the Dragonhawk Feather.

Return to the hollow tree at the southern end. The four ghosts will now be present, allowing you to open the cache and claim the bear.
Untainted Grove Crawler for Sporespawned Cache
Untainted Grove Crawler is a fungal-themed mount found in Fungara Village within the Harandar region.

Ensure you are navigating the lower section of the village, not the upper tiers. Look for an amber wall.

Against this wall, pick up the Fungal Mallet resting on the ground. Looting this item grants a buff that lasts for exactly five minutes. Run directly across the small pond to a nearby hut. Inside the hut, strike the gong.

This action spawns an aggressive enemy alongside the Sporespawned Cache. Open the cache immediately to secure the Untainted Grove Crawler.

Ruddy Sporeglider for Peculiar Cauldron and Crystalized Resin Fragments
The Ruddy Sporeglider requires light gathering in the northern reaches of Harandar.

The Peculiar Cauldron is located directly under the large bridge in the top region of Harandar.

It remains locked until you gather exactly 150 Crystalized Resin Fragments.

Farm these fragments by flying high above the Harandar river system. Look for shiny particles or disturbed earth on the ground.
Click these nodes to loot between three and seven fragments at a time. If your count gets stuck at 149 and nodes stop appearing, simply delete two or three fragments from your inventory. This forces the nodes to render again. Once you hit the required 150 count, return to the bridge and open the cauldron.
Vivacious Chloroceros for Treasures of Harandar
Earning the Vivacious Chloroceros requires completing the Treasures of Harandar achievement, which tasks you with opening nine specific chests across the zone.

Pay special attention to the Gift of the Cycle treasure, as it requires a multi-step puzzle. Collect A Rolled-Up Pillow, A Lost Hunting Knife, and a scattered bowl from three different marked locations near the Den.

Carry these items to the three tallest mountain summits surrounding the area. At the top of each mountain, click the altar to summon a spirit and hand over one of the items.

Once you satisfy all three spirits, drop down into the center of the den to the pool of water.

Open the Gift of the Cycle chest to finalize the achievement and receive the mount.
Insatiable Shredclaw for Final Clutch of Predaxas
The Insatiable Shredclaw mount is hidden inside a cave puzzle in the Voidstorm region.

Locate the cave entrance for the Final Clutch of Predaxas. Enter the cavern and clear out the standard enemies blocking the path to the bottom.

You will face a light-based movement puzzle. If the moving zone damage touches your character, you teleport back to the start. Wait for the light patterns to despawn, then run forward and hide in the designated gap on the right-hand side. Wait for the lights to catch up and disappear again before running to the end of the corridor. Loot the chest safely to add this predator mount to your collection.