
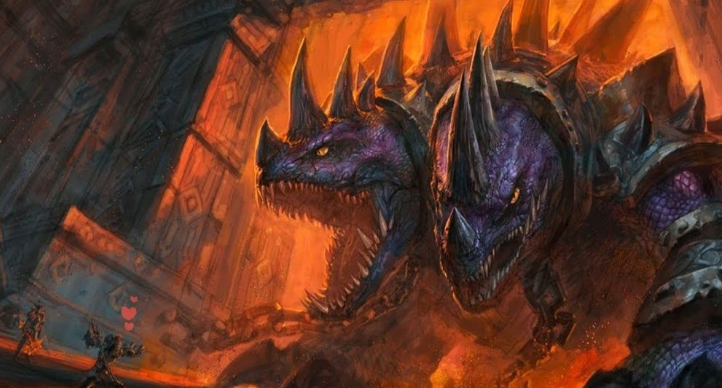
Blackwing Lair Raid in Season of Discovery Phase 5
Blackwing Lair (BWL) holds a significant place in the history of World of Warcraft, initially introduced in the game’s original release. This raid is known for its challenging encounters and intricate mechanics that require precise coordination among players. In the Season ofDiscovery Phase 5, BWL re-emerges with new trials and mechanics, elevating the difficulty and strategic depth of the encounters. The introduction of Victor Neus, a notable NPC located at the entrance of the instance, allows players to activate various trials that modify the raid’s dynamics.

When the players face formidable foes and complex mechanics that challenge even the most seasoned adventures and the best way for them will be using the service WoW SoD Blackwing Lair Raid Boost from an assured provider that will complete everything with high guarantee.
New Trials/Difficulties of BWL Raid
The new trials introduced in Phase 5 significantly impact the raid’s complexity. Players can choose from five trials, each offering unique mechanics that modify encounter strategies.
- Red Trial: This trial introduces a debuff called Blazing Wounds that inflicts fire damage over time. The debuff can stack, requiring healers to act swiftly to mitigate its effects.
- Blue Trial: Participants in this trial will receive a debuff that telegraphs an explosion after a brief duration, dealing arcane damage to nearby allies. Coordination is essential to manage this mechanic effectively.
- Green Trial: This trial places a green circle around random players, which upon expiration, releases a poison cloud. Affected players must promptly move away from the raid to drop the poison safely.
- Bronze Trial: Randomly alters the movement speed of players, adding an unpredictable element to positioning and mobility during encounters.
- Black Trial: This trial escalates the challenges of each encounter, modifying specific mechanics to create “hard modes” that necessitate precise execution and heightened awareness.
These trials alter how encounters are approached, enhancing the overall experience and introducing fresh challenges that demand adaptability and teamwork.

Razorgore Boss Strategy in SoD Phase 5
Preparation
Raid Composition:
- Recommended: 3 tanks and 4-5 healers. This configuration ensures sufficient damage absorption and healing for sustained survival.
Initial Positioning:
- Melee DPS should be placed on the left and right sides of the room.
- Ranged DPS and Healers should be centrally located to manage interrupts and damage.
Engagement
Activate the Orb:
- The main tank activates the orb, which triggers Razorgore and initiates the fight.
- Important: Avoid getting overwhelmed by adds immediately.
Egg Destruction:
- Focus on destroying eggs using the pet bar. Interrupt casters as a priority.
- Manage Adds: Ensure the raid clears adds as they spawn to minimize damage.
Drake Management
Chromatic Drake Spawn:
- After destroying 10 eggs or after 2 minutes, the unstable Chromatic Drake spawns.
- The off-tank should pick it up and position it away from the raid to prevent chaos.
Final Phase
Conclude the Fight:
- Once the Drake is defeated, refocus damage on Razorgore.
- Maintain tight positioning and maximize damage output to secure a swift victory.
Vaelastrasz Boss Strategy in SoD Phase 5
Preparation
Tank Configuration:
- Utilize three dedicated tanks to manage threat effectively.
- Healers should be prepared to handle fluctuating health levels due to damage mechanics.
Positioning:
- Players should space themselves out to minimize the risk from Burning Adrenaline.
Engagement
Initial Mechanics:
- Upon engagement, Vaelastrasz applies Essence of the Red, restoring mana and resources to players.
- Players will receive Burning Adrenaline, increasing damage and haste but posing an explosion risk.
Stack Management
Monitor Stacks:
- Players must move out of the raid at 15-20 stacks to prevent explosive damage.
- Consider using flasks of petrification to absorb damage if caught with high stacks.
Tank Rotation
Tank Swaps:
- As stacks accumulate, tanks should swap effectively to maintain threat without endangering the raid.
- Healers need to closely monitor health bars, especially for players with elevated stacks.
Final Push
Conclude the Encounter:
- Focus on high DPS and effective healing to bring down Vaelastrasz before critical stack thresholds are reached.

Broodlord Boss Strategy in SoD Phase 5
Preparation
Trap Awareness:
- Be vigilant regarding lightning traps scattered throughout the suppression room.
- Movement: Coordinate movement to avoid trap damage during the encounter.
Positioning:
- Engage Broodlord in the far corner of the room, ensuring avoidance of traps.
Engagement
Initial Phase:
- Manage threat as tanks absorb Broodlord’s physical attacks.
- Avoid Knockbacks: Players must be cautious of knockbacks that could push them into traps.
AoE Phase
Transition to AoE:
- At 50% health, Broodlord teleports and begins AoE damage.
- Ranged DPS must quickly reposition to continue dealing damage safely.
Final Strategy
Conclude the Encounter:
- Maintain high DPS while managing positioning to avoid AoE damage.

Firemaw Boss Strategy in SoD Phase 5
Preparation
Gear Requirements:
- Ensure all tanks possess Onyxia Scale Cloaks to mitigate incoming fire damage.
- Group Setup: Ranged DPS should position to avoid direct line of sight.
Engagement
Damage Mechanics:
- Monitor the Flame Buffet debuff, which increases fire damage taken.
- Maintain strategic distance to manage and mitigate debuffs effectively.
Stack Management
Static Electricity:
- Track stacks of the Static Electricity debuff; players should move out at 8 stacks to minimize damage.
- Utilize line of sight tactics to drop debuffs when necessary.
Final Strategy
Conclude the Encounter:
- Continue managing debuffs while ensuring a high DPS output to defeat Firemaw.
Ebonroc & Flamegor Boss Strategy in SoD Phase 5
Preparation
Tank Setup:
- Assign a third tank to facilitate smooth swaps during the fight, ensuring coordinated transitions.
- Positioning: Spread out to minimize the impact of Brand of Flame and Brand of Shadow mechanics.
Engagement
Dual Dragon Tactics:
- Engage both dragons simultaneously, maintaining control over brand mechanics.
- Consistently apply DPS to both dragons while avoiding damage-over-time effects.
Brand Management
Stack Swapping:
- Aim for three stacks of either brand before swapping to reset debuffs.
- Coordinate tanking to ensure efficient swaps between dragons.
Special Mechanics
Stop and Go:
- Players must stop moving when hit with the Stop debuff, or they will take substantial damage.
- Conversely, during the Go debuff, players must move or risk taking damage.
Final Push
Conclude the Encounter:
- Synchronize the kills of both dragons to prevent one from enacting its enraged phase.

Chromaggus Boss Strategy in SoD Phase 5
Preparation
Debuff Control:
- Assign a hunter to tranq during frenzy phases to keep Chromaggus manageable.
- Designate a mage to cast Detect Magic to identify vulnerabilities.
Engagement
Initial Mechanics:
- Monitor Chromaggus’ breath attacks; focus on avoiding damage while delivering consistent DPS.
- Keep track of debuffs to ensure effective healing throughout the encounter.
Damage Mitigation
Cooldown Coordination:
- Utilize defensive cooldowns during breath attack sequences to absorb damage.
- Ensure healers are prepared with sufficient resources to manage high damage output.
Final Phase
Conclude the Encounter:
- Maintain consistent DPS while effectively managing Chromaggus’ breath attacks and debuffs.
Nefarian Boss Strategy in SoD Phase 5
Preparation
Gear Check:
- Ensure all raid members are equipped with Onyxia Scale Cloaks to mitigate Shadow Flame damage.
- Positioning: Split the raid into two groups for effective management of spawning draconids.
Engagement
Initial Add Control:
- Focus on defeating draconids as they spawn while maintaining threat on Nefarian.
- Ensure players are aware of their positioning to avoid unnecessary AoE damage.
Special Mechanics
Class Call Management:
- Prepare for Nefarian’s class calls; each class will receive unique mechanics to handle.
- Ensure players are aware of their responsibilities, including debuff management and positioning.
Final Phase
Conclude the Encounter:
- Maintain awareness of the environment, utilize cooldowns effectively, and execute a coordinated attack to defeat Nefarian.
- Watch for draconid resurrections and ensure a swift response to manage the chaos.
These strategies serve as a comprehensive guide to mastering each boss in Blackwing Lair during Season of Discovery Phase 5. By focusing on preparation, engagement, and coordinated execution, raids can achieve success in these challenging encounters.


